Category Archives: recipe

Soggy Bagel Day and Cheesy Chickpeas

Never, ever trust weather.com.  They lie!  The forecast was for upper 50s and cloudy this morning with 0% chance of rain.  So, that meant biking for breakfast!  There was maybe a touch of mist while riding there, but the temps felt pretty good at 58.  We arrived to our destination and it started to rain while we were sitting inside! D’oh!

I did enjoy my bagel, though!

John had coffee cake, which you can see in the background.  They make awesome coffee cake at North Country Cafe.

It stopped raining mostly, so we headed home.  Then the mist began again and then rain.  It was a dreary and icky ride home!  I went slower because of splash back from my tires, slower braking times and then the car/truck blow back (yuck).

Soggy rider!

Hey, at least we got 12 miles in, right?  After a morning of work, I made up a quick lunch.  I sauteed some broccoli in coconut oil and added in ground turkey, 1/2 cup of white rice and some orange ginger sauce (LaChoy).

This came out to be a pretty tasty lunch!

I loved how the sun came out in the afternoon.  It was supposed to be cloudy all day, but then we already know how accurate the weather forecast was today  🙄

John presented me with my afternoon latte:

I had some cookie nibbles today as well.  John made up chocolate cookies for his poker game, so we taste tested the deformed ones.  Yum!  John is quite the baker.

I made up a thrown together dinner tonight that actually tasted quite good.  I had a few cans of things in the pantry that I wanted to use, so I came up with Cheesy Chickpeas!  I know it sounds weird, but it came out really tasty.

Ingredients:

  • 1 tablespoon of oil (I used macadamia)
  • 1 clove of finely minced garlic
  • 1/2 teaspoon whole cumin seeds
  • 1/2 teaspoon of salt
  • black pepper to taste
  • 2 tablespoons of tomato paste
  • 2 tablespoons of diced green chilies
  • One 15 oz can of chickpeas, drained and rinsed
  • 1/2 cup of water
  • 2 oz of shredded cheese (I used cheddar).

In a medium saucepan, heat the oil.  Then add in the cumin seeds and cook until they sizzle (just a couple minutes).  Add in the garlic, chickpeas, tomato paste, green chilies, salt and pepper.  Cook this mixture for about 5 minutes over medium heat.  I might add as an aside that just stopping the recipe here is actually really tasty.

Add in the half cup of water and bring to a simmer for several minutes.  Slowly stir in the cheese  so that it has a chance to melt.  Don’t go using any fat free cheese here; you want it to melt.  When the cheese is melted, serve and enjoy!

I loved this.  I was kind of like a southwestern-ish style chickpea.  I had mine with some mango on the side.

The whole batch is about 955 calories, so divide as you wish. I ate about half as this was my entree for dinner.

Tomorrow is more new lifting moves and I am excited!  I get to do one of my very favorite moves – the stiff-legged deadlift!

Question:  What is your favorite way to eat chickpeas?

Lemon Poppyseed Protein Cake

John made a recipe that he tweaked from Ask Georgie for Lemon Poppyseed Protein Bars.  I called them cake because his version came out more like this.

We had this for breakfast a month or so ago.  You could also have it for dessert!

The original recipe is here, and this is what John did. **

Dry ingredients
• 1 1/3 cups white whole wheat flour
•  2/3 cup sugar
• 30 grams plain whey protein powder (2 scoops)
• 2 tablespoons poppy seeds
• 2 teaspoons baking powder
• ½ teaspoon baking soda
• ½ teaspoon salt

Wet ingredients:
•  1 cup of 1% milk
•  1/2 cup regular sour cream
• ¾ cup unsweetened applesauce
• 1 tablespoon  oil
• 2 ½ teaspoons lemon extract
• 2 eggs

Preheat oven to 350 F.  Coat a 9 x 9 inch square baking pan with cooking spray.

In a large bowl, mix together all of the dry ingredients and set aside.

In another bowl, mix all wet ingredients together really well.

Make a well in the center of the dry ingredients, then pour in the wet.  Fold the mixture together until moistened. If you over work the batter, these will be tough.

Pour the batter into the baking dish and bake for 40 – 45 minutes or until a toothpick comes out clean.  You may need to keep checking this.

Cool and cut into 9 pieces – cause I like the pieces big and I told John no more than 9 pieces in a 9 x 9 in pan  :mrgreen:   The texture is very moist.  It is definitely best served a little warm, so heat up your leftovers a little bit.

Nutritional Stats:  Based on 9 pieces.  Your results may vary based on protein powder and sour cream/milk. 

Per piece:  207 calories, 5.3 grams of fat, 29 grams of carbs,  2 grams of fiber, 8 grams of protein.

**(Changes made: Georgie uses Splenda, vanilla protein powder, and adds lemon zest.  John substituted the fat free greek yogurt with both the milk and the sour cream.  He used unflavored whey protein. He also used a smaller pan for thicker pieces.)

I topped mine with a bit of coconut butter.  😀

Sourdough English Muffins

I was a little nervous about trying to make english muffins, and I really don’t know why because they weren’t that hard!  I did want to use my sourdough starter, though.

You can use this recipe with yeast if you don’t have/want to use sourdough starter.  The technique is the same once the dough is made.

I pulled my starter out of the fridge and fed it a few times to make sure it was still alive – and it was!  So, I was set for this recipe to try.

Ingredients

  • 1/2 cup sourdough starter (fed and stirred)
  • 1 cup of 1% milk
  • 2 to 2-1/2 cups of flour
  • 3/4 tsp salt
  • 1 tbsp sugar
  • 1 teaspoon baking soda (not powder)
  • cornmeal for dusting

The night before you want to make the muffins, take your well-fed starter and stir it to remove the bubbles.  Then measure out a 1/2 cup.  This is Breadipus Rex!  You do have to name your starter, you know.

In a bowl, mix the 1/2 cup of starter with 1 cup of milk and 2 cups of the flour (don’t use all the flour).

Mix really well, cover with plastic wrap, and let sit overnight.

I woke up the next morning and was pleased to see there was some action overnight  😉

To this, add the 1 tablespoon of sugar, the 3/4 teaspoon of salt, and the baking soda.  Now here is where I goofed.  Since I had not had any coffee yet, I added baking powder instead of soda.  So, I decided to go ahead and also add the baking soda!  You don’t need to do this, but just to let you know it didn’t hurt anything.  Maybe it helped, too. Who knows.

Anyway, after this is mixed in, you can either turn this out on a well-floured board and knead for 5 minutes adding the remaining flour to keep the dough from being too sticky.  I dumped mine into the Kitchenaid and used the dough hook to knead.  I only needed about 1/4 cup of flour as our humidity is really low right now.  The trick with bread is to not add too much flour.  Many people put in flour until the dough is dry, which will make a heavy and dense loaf.  The dough should be slightly tacky.

After kneading, sprinkle the board well with flour.  Dust the top of the dough with more flour to roll out.

You might need to let the dough rest for 5 minutes or so to relax a little.  Flour a rolling pin and roll the dough out about almost a half inch or so.  Then use a cutter dipped in flour to make circles.  I used a drinking glass, since I don’t have a biscuit cutter.

My suggestion is to find something that is 3 to 3-1/2 inches in diameter.  This glass is only 2, maybe 2-1/2 and the muffins were smaller than I would like.  Live and learn.    Reroll the scraps and cut again.  You also can just make small dough balls and flatten them if you don’t care about the shape (which I did with the last few scraps).  Or use a pizza cutter and make square muffins.  Then you only have to roll the dough once.

Lay out a piece of parchment paper or a cookie sheet and dust it with cornmeal.  Place the little circles on this surface.

Cover these babies with plastic wrap and let sit for 45 minutes.  I am not really sure why, because they do not rise much at all.  In fact, I was wondering if they were going to turn out.

Next is to heat a griddle to medium.  And I do mean medium.  The low side of medium.  Heat management is crucial to cook these.  Once the griddle is heated, brush with oil and lay out the disks.

I really didn’t think these were going to come out since they were so flat, but they started to puff up right away!  Cook on the first side for 5 minutes or so.  This is why you want to be on the lower end of the heat or they will burn and the middle will be raw.  Heat management, people!

Carefully flip the muffins over:

Almost over done on this side.  I had to lower the heat.  Cook for another 5 minutes or so until done.  I found that a good test was to poke a fork at the side of the muffin to make sure that part was not doughy.

Cool on a cooling rack.

Now you all know to never use a knife, but to  fork split  your english muffins, right?

I poked a fork around the edges of these before bagging half of them to freeze.

Split open:

Squeeeeeee!!!!!  I was really happy to see this!  I’m feeling might proud of myself, too  :mrgreen:

Calories for the 2 inch muffins is about 100 each.  If you do a bigger size and get 12 muffins out of the batch, they will be about 120 each.  I have to do an exact count on them, but this recipe is pretty lean.

Recipe: Flourless chocolate chip cookies

I found this recipe on Pinterest when I first started pinning and it didn’t take long for me to make them.  The original recipe is from Recipe Girl and I edited a bit for our smaller household.

 Easy enough and the ingredients were already in the house!  Double score.

Ingredients:

Note – I like to go by weight, especially when baking.

  • 180 grams powdered sugar (1.5 cups)
  • 35 grams unsweetened  cocoa powder (1/3 cup)
  • 1/8 teaspoon salt
  • 45 grams liquid egg whites  (3 tablespoons or 1 to 2 egg whites)
  • 1.5 teaspoons vanilla extract
  • 90 grams  semi-sweet chocolate chips (1/2 cup)

Preheat oven to 350 F.

Line a large cookie sheet with parchment paper.

Sift together the sugar, cocoa and salt.

Mix well.  Add the vanilla and the egg whites. Stir well.  This is the point where you need to judge if you need to add more egg whites or not.  It does not take much to change the consistency, so don’t add a whole white if you are using the whites.  It is much easier to do this with the liquid egg whites. You want a stiff, brownie-type batter.

If the batter is too liquidy, then the cookies will spread out too much when baked.  Stir in chocolate chips.

Using a small disher, portion out 11 cookie balls onto the cookie sheet.   I use a disher that is probably 1/8th cup?  This size:

You might actually get 12 cookies out of this, but I ate some of the batter 😳

Bake 14-15 minutes until the cookies are cracked on top.  They will spread and flatten a little bit.
Remove parchment paper to a cooling rack. Let cookies cool completely before removing from paper.  Trust me on this.  They are too fragile to move until they set up.

Delicious!

The cookies are very delicate with a slightly crispy outside and kind of gooey inside.  Store in an airtight container on the counter.  I find the next day they are wonderful popped in the micro for 10 seconds before eating.

For 11 cookies, the stats per cookie are:

124 calories, 2.5 grams of fat, 24 grams of carbs, 1.5 grams of fiber, >1 gram of protein.

Recipe: Banana Flaxjacks!

So, you all know how I love my 1-minute muffin and all it’s permutations, right?

Well, I got thinking about using a banana it to make more of a pancake batter and a little on the sweet side.  The result?

Grain free and gluten free.  Now there are a couple tricks with this recipe, so maybe be drinking a cup of coffee while you prep breakfast.

Serves 1.

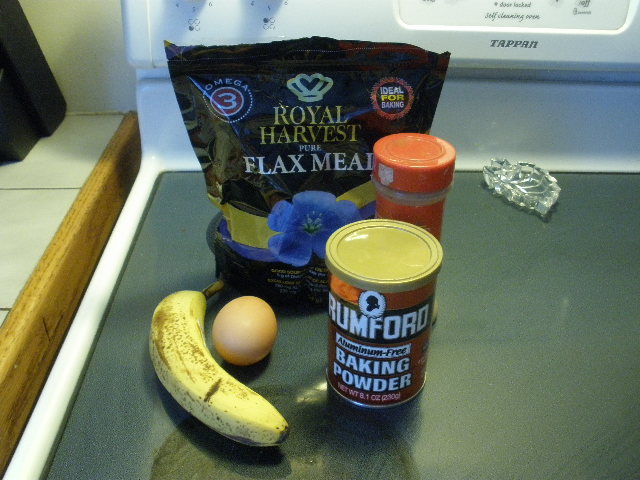
Ingredients:

  • 1 ripe banana
  • 1 egg
  • 26 grams of ground flax meal (about 4 tablespoons, but please weigh)
  • 1/4 teaspoon of baking powder
  • cinnamon to taste.  I use about 1 teaspoon!
  • 1 tablespoon of water (optional)

First, a note about flax meal.  I have found there is a difference in flax meal between brands, therefore the water may not be needed.

Bob’s Red Mill brand seems to be a little less absorbent than the brand pictured, so you may not need the water if you use Bob’s Red Mill.

Preheat a nonstick skillet over medium heat while you assemble the ingredients.

Mash the banana really well in a small bowl.  When I say mash it, I mean mash it liquidy – like this.

If your banana is not super ripe, pop it in the microwave for 20 seconds or so and it will soften right up for mashing.

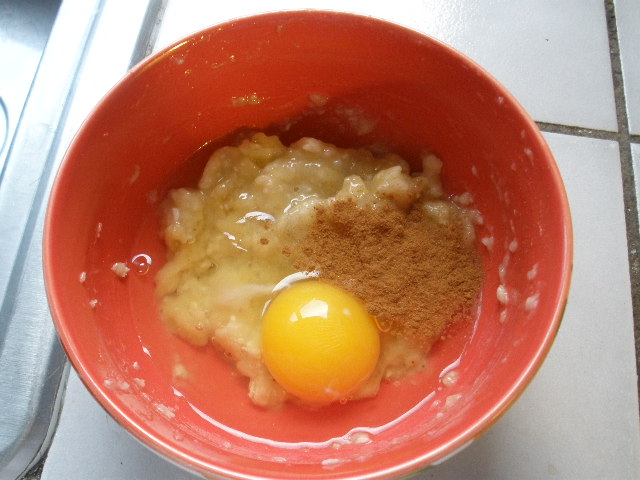
Add in the egg and cinnamon and mix well:

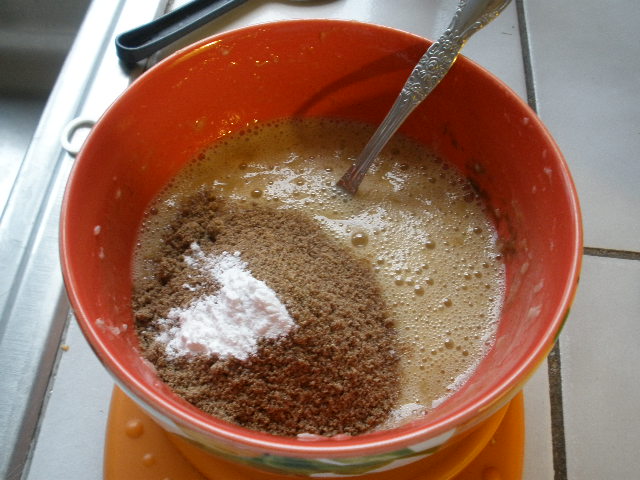
Now add the flax meal and baking powder:

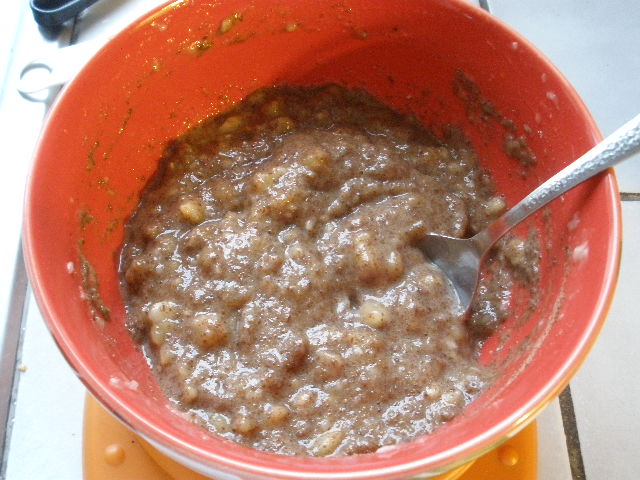
Mix well.

Add the water if you need to make sure you have a loose batter. Now is the point you want to work quickly.  Flax will thicken up as it sits.

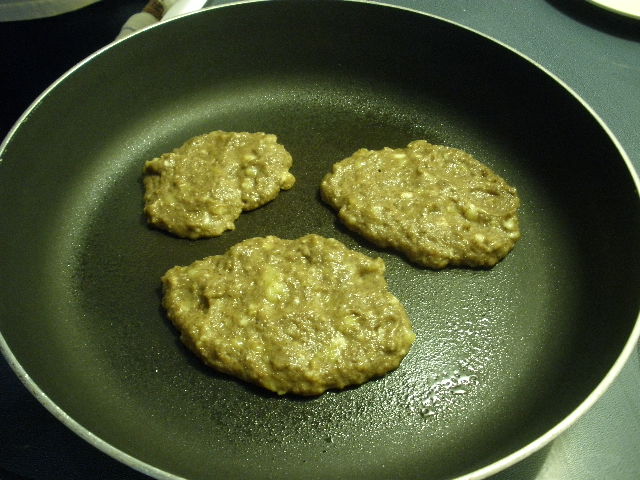
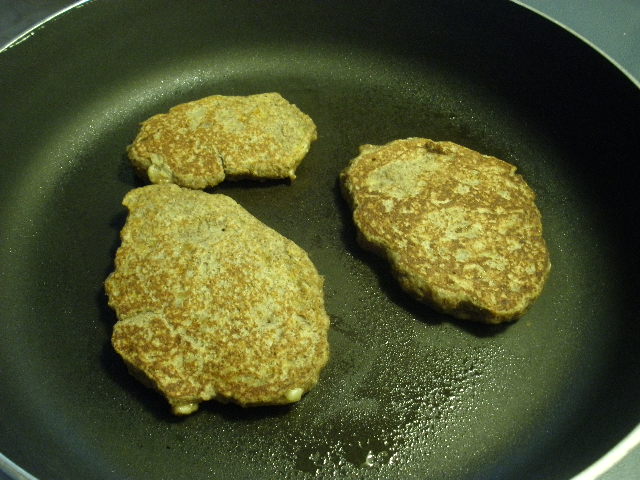
Give the pan a quick spray with nonstick spray. Pour the mixture into 3 relatively equal cakes (I seem to have problems with this).  Spread the batter a little to make the cakes thinner so they cook all the way through.

Keep the heat medium so that you cook the cakes throughout without burning them.  You may be tempted to raise the heat.  Don’t do it.  Check the bottom of the cakes with a spatula and flip them when lightly browned on the bottom.  Be gentle!

Cook for another couple minutes on this side until cooked through.

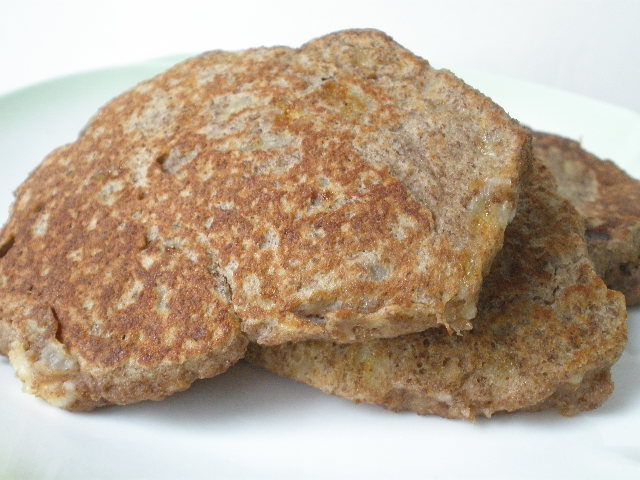
Plate up and enjoy!

These are moist and sweet and very banana tasting.  Top as you like.

Nutritional stats for 3 flaxjacks (the entire batch)
Calories: 245, 14 g of fat, 23 g of carbs, 11 g of fiber, 13 g of protein.

Note, there will be a bit of variation in calories depending on the size of your banana. (no jokes, please).

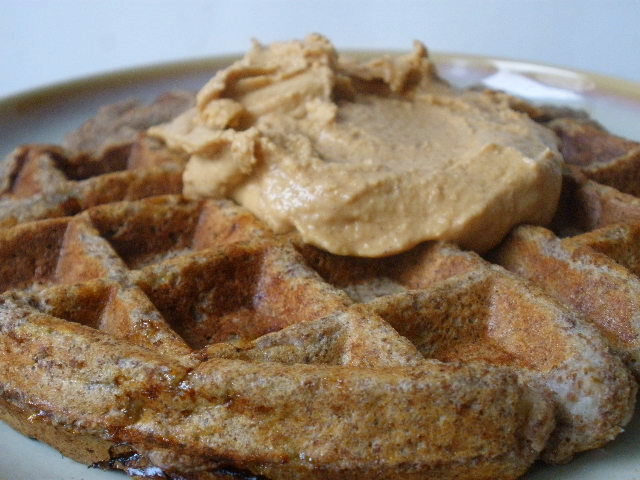
If you don’t want to bother with making pancakes, just spread the batter into a waffle iron!

Meatless Monday – “Meatless” Balls

I don’t normally follow Meatless Monday on purpose, but sometimes it happens that I do all vegetarian meals.  We were out yesterday for breakfast and there was Rachael Ray’s magazine there, so I was reading that. I have never read her magazine before and there sure are a lot of recipes in it! LOL.  Anyway, I saw this one and thought just the meatball portion would be good.  She calls for grinding almonds in a food processor and thought “Why not just use almond flour?”  Especially since I have a 5 pound bag of it!  :mrgreen:  I also left out the lemon zest.

These are gluten free and grain free! They came out good.  I had mine on GF pasta:

They were quite easy to make.

Ingredients:

  • 2 oz of almonds, ground fine in a food processor *or* 2 ounces of almond flour.
  • 1 can of chick peas (15 oz), drained and rinsed
  • 2 eggs
  • 3 oz of shredded mozzarella cheese (3/4 cup)
  • 1/2 teaspoon salt
  • 1/2 teaspoon pepper

Preheat oven to 350 F.

In a bowl, mash together the eggs and chick peas with a potato masher until just some chunks remain.

It will be mostly liquid with small chunks of chickpeas.  Kind of like oatmeal, I guess?

Now add in the almond meal, cheese, salt and pepper:

Mix well.

Line a baking sheet with foil or parchment and spray with cooking spray.  Divide the mixture into 12 equal portions and form into balls.  I weighed out about 40 grams for each meatball.

Place onto baking sheet.

Mist lightly with cooking spray.  Then bake for 25 minutes.

The texture of these is very much like meatballs, especially when covered with sauce.  I liked these quite a bit.  Very mild in flavor and I think you could do some fun things like adding green chilies or sun-dried tomatoes.  2 meatballs makes a good and filling serving amount.

Nutritional Stats:

Makes 12 meatballs. Per meatball:  108 calories, 4.5 grams of fat, 4 grams of protein. 

Lifting and Lemon Curd

Off to the gym this morning! It was surprisingly warm in the 40s. We have had warm weather the last few days, but some snow is soon to come.

Exercise Set/rep/weight Muscle worked
Lying Leg Press 3 sets of 10 at 100# Lower Body
Straight Leg deadlift 3 sets of 10 with 70# bar Low back and hammies
Seated Lat Row 3 sets of 10 at 50# Back
Decline Situp 3 sets of 10 Core
Barbell Chest Press 3 sets of 10 with 55# bar Chest
Arnold Press 3 sets of 10 with 10# DBs  (20# total) Shoulders
Kickbacks 3 sets of 10 with 15# DBs (30# total) Triceps
Lower Back Extension 3 sets of 10 at 90# Low back

This was a tough workout as I reduced my rest time between sets. Then I hopped on the treadmill and walked for 1.5 miles.

I was hungry!! when I got home.  I made up protein pancakes instead of waffles for a change.

Note that I added more blueberries after this picture because my whole serving would not have made as pretty a picture  😀

So, here is the recipe for the lemon curd.  Only a few ingredients and super easy!

Fashion up your own double boiler.  I used a stainless steel bowl and a saucepan filled with a bit of water.  You just need a bowl a little bigger than the pan.

Turn the heat on to bring the water to a simmer.

Ingredients:

  • 3 eggs
  • 1 cup of sugar
  • 1/2 cup of fresh squeezed lemon juice (2 large lemons)
  • 1/4 cup of butter, melted.

In the bowl, add the eggs and sugar and beat with a whisk.

Set over the double boiler and then add the butter and lemon juice.

Whisk constantly over the simmering water until thickened.  It took less than 10 minutes for this to happen.

How easy is that??  This is intensely flavored, so you don’t need much.

It filled up a 16 ounce jar:

This is approximately 50 calories per tablespoon.  Just  a bit more than jam.

Store in the fridge. I don’t know about the shelf life of this.  Guess we will find out!

I had a very productive work day today and finished up early and got my practicing done.  I am enjoying some tree time now:

Do you like the tippy top?  :mrgreen:  We need to bend that back. The nice thing about an artificial tree is that Pixie doesn’t care about climbing it.  She actually pretty much ignores it, although she likes to lay under it and throw her toys under there.


Once John is done with his things to do, he and I are off tonight to have a date/coffee night!


Pumpkin Pie Bars – grain free!

How about a Monday recipe post for a change?  Seeing as you all don’t want to see me on a weekday without the espresso machine… One is on the way, though.

And….. my magazine article came out and I have not gotten a copy yet, so I will talk about that on Tuesday!!  Eeeee – I am nervous!

So, here are the pumpkin pie bars that I messed around with and made grain free.  They came out quite good!

Ingredients:

Crust:

  • 1-1/2 cups of almond flour (see note below if you don’t have almond flour)
  • 1/4 cup granulated sugar
  • 1/4 cup packed brown sugar
  • 1 teaspoon of cinnamon
  • 5 tablespoons of butter
Filling:
  • 1 cup of canned pumpkin puree
  • 1 egg
  • 7 oz (approx 3/4 cup) of lowfat vanilla yogurt
  • 1 teaspoon of cinnamon
  • 1/2 teaspoon pumpkin pie spice
  • pinch of salt

Preheat the oven to 375 F.

Line a 9×9 baking dish with either a parchment or foil sling.  I didn’t do this and I think it will be easier if you do to get these out.

In a large bowl, mix together the almond flour, sugars, and cinnamon together.

Add the butter and using your hands, knead the butter in like you would a pastry dough.

It will look like this:

Reserve 3/4 cup of this crust mixture.  Press the rest into the bottom of the 9×9 pan firmly.

Crust and reserved crumbs:

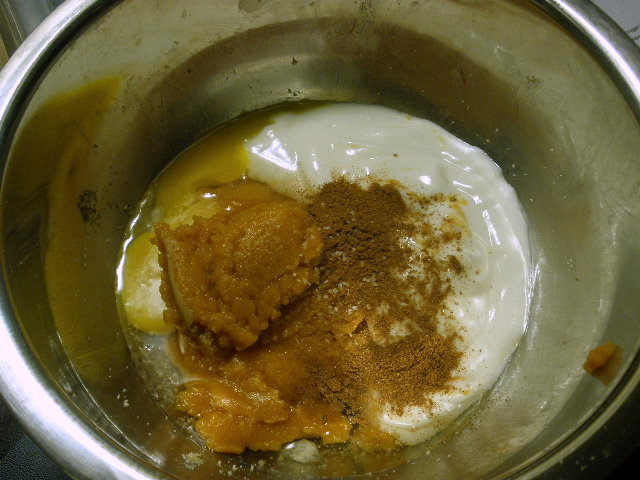
In the same bowl as you mixed the crust in (saving dishes!!), mix the egg, pumpkin, yogurt, spices, and salt.

Pour over the crust.

Jiggle the pan to make sure the filling is even. Now evenly sprinkle the reserved crust over the top.

Bake at 375 for about 45 minutes.  The time may vary by 5 minutes or so depending on if your pumpkin came out of the fridge, which mine did.  You just want the center set like a pumpkin pie would be.

Cool completely and serve or refrigerate.  Slice into 16 pieces.  These are a little hard to get off the bottom of the baking dish, so I would recommend the sling.  It’s mostly the edge pieces that stick.  Eat with a fork!

I don’t have the nutritional info right now as I haven’t had time to do it.  They do have more fat due to the almond flour, but the pieces are small,and I certainly wouldn’t tell if you ate two.  😉

* if you don’t have almond flour, you can make these as a grain crust with 3/4 cup of flour and 1/2 cup of ground nuts (pecans or walnuts).

Recipe: Roasted Red Pepper Tomato Soup

Fall and winter are the time for warm soups!  I don’t care for canned soup very much, but I forget to make my own.  I do like the Pacific Foods soups and I tried a roasted red pepper and tomato one.  I wanted to make something similar that would be grain free that I could build into different soups.

Ingredients:

  • 2 tsp of oil (I used coconut)
  • 1/4 cup of chopped onion
  • 1/2 cup of roasted red peppers packed in water (about 4 peppers)
  • 1 can of diced tomatoes 15 oz, low sodium
  • 2 cups of  broth (I used veggie)
  • 2 tablespoons of light cream
  • salt and pepper

In a sauce pan, melt the coconut oil and add the onions (diced).

Saute for several minutes until onions are translucent.
Add the red peppers and cook for another minute or so.

Add the tomatoes with juice and the 2 cups of broth. Bring to a boil, reduce heat and simmer for 15 minutes.

Use an immersion blender to puree the soup or use a food processor in batches (please be careful!).

I like smooth soups, but you could make it as chunky as you like. Add salt and pepper to taste.

Remove from heat and stir in the cream.

And voila – soup!  This is a sweet tasting soup.  I did not add much in the way of spices or garlic because I wanted to change up the soup later on.

In this bowl, I added some cooked rice and cooked lentils for a quick meal that had extra protein and fiber:

I am thinking it would be really good with some ground beef, brown rice, and some cumin in there with a dollop of sour cream on top.

Stats:  

Serves 4.  Each approximately 1.5 cup serving is 82 calories, 5 grams of fat, 10 grams of carbs, 9.5 grams of protein.


What would you do with this soup base?

Recipe – almond flour biscuits

These turned out pretty good, so I thought I would share the recipe!

It’s kind of based on the 1-minute muffin recipe.  When going grain free, the biggest challenge is wanting baked goods.  You all know I love the coconut flour, but I wanted to try the almond flour as it is a little easier to work with.  Coconut flour soaks up moisture like a son of a gun!  Anyway, the best price I found on almond flour is from Honeyville Grain.

If you join their coupon club, they periodically send 10% off email vouchers, plus there is a flat shipping rate, which makes the 5# bag pretty economical and less than buying it in the store!

Anyway, back to the recipe.  This was designed for the toaster oven and to just make 2 biscuits.

Ingredients:

  • 1 egg
  • 42 grams of almond flour (approx 1/3 cup)
  • 1/2 tsp liquid oil
  • 1/4 teaspoon of baking powder *
  • pinch of salt
  • pinch of oregano and basil

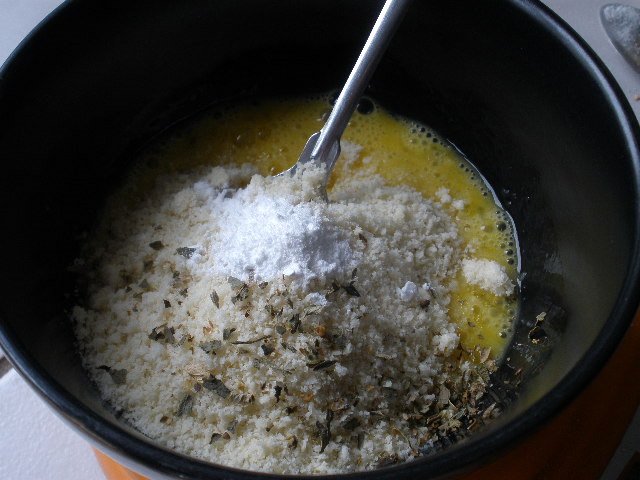
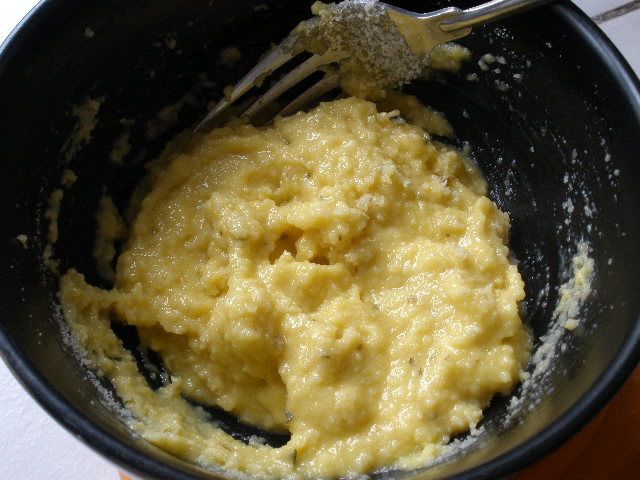
In a small bowl, beat the egg.  Then add the rest of the ingredients.

Mix well to make a thick batter:

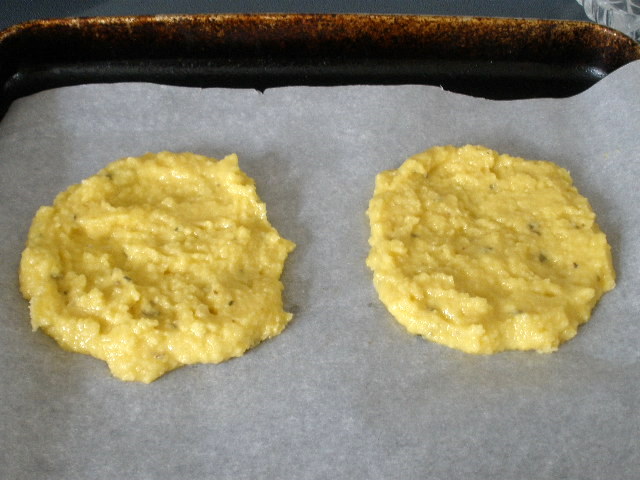
Line your toaster oven baking tray with a piece of parchment paper.

Divide the batter into 2 portions and spread out to make rounds about 1/4 inch thick or so.

Bake in the toaster oven at 350 degrees for 15 minutes.

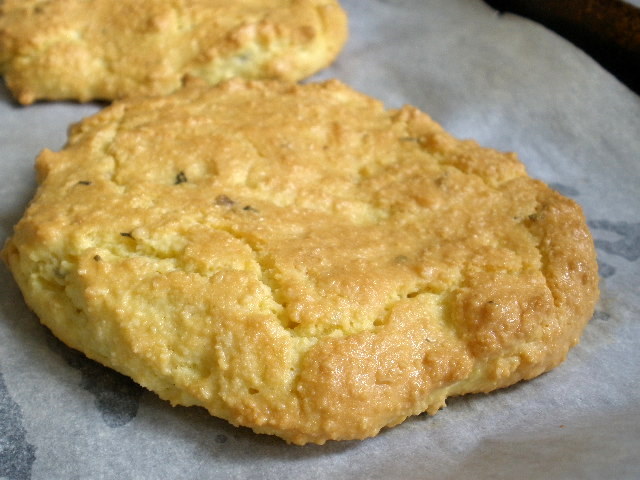
Remove to a cooling rack and enjoy!

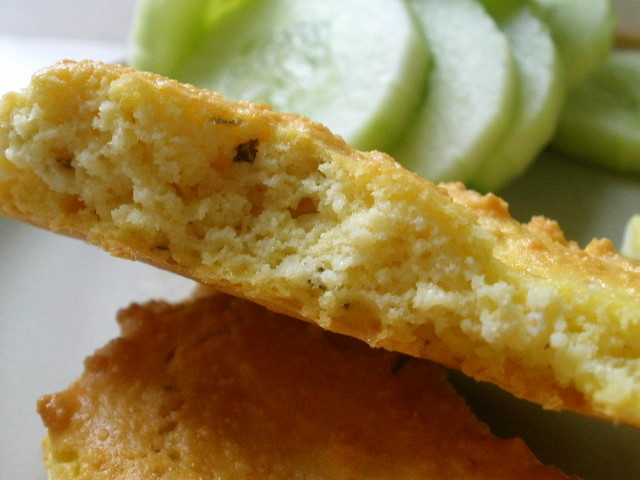
The texture is nice on these.  Kind of biscuity and bread like with a nice crumb.

I recommend a bit more salt for them.  I also think that added a little shredded cheddar to the batter would be really, really good!

Nutritional stats:  Makes 2 biscuits.  Each biscuit is 177 calories, 15 grams of fat, 5 grams of carbs, 2.5 grams of fiber, 7.5 grams of protein

Keep in mind almond flour is fatty, so that is why the fat content is high on these.  I am not concerned about that, but then I am eating 1 and not 3 of these at a time.

I  could see using one of these for the base of a mini pizza, too.  I was hoping to be able to slice it in half and use as a bun, but it might be just a bit thin for that.  I will have to try it and see.

* I do realize that most baking powders have a bit of cornstarch in them, so if the miniscule amount matters to you, there are brands out there that are completely grain free.