Category Archives: recipe

Recipe Tuesday: Lightened up eggnog!

I loves me some egg nog, you all know that.  Unfortunately, the light versions of the store bought stuff are full of ick!  John has become the maker of the nog in our house and lightened up Alton Brown’s version:

Ingredients:
  • 4 eggs, separated
  • 1/3 cup  plus 1 Tablespoon sugar
  • 3 cups 1% milk
  • 1 tsp fresh grated nutmeg
  • 3 oz bourbon (optional)
Beat the egg yolks with a whisk in a large bowl until they lighten in color.   Add 1/3 cup of sugar and mix well.
Meanwhile in a medium saucepan, cook the milk and nutmeg on medium-high heat, stirring often.  Heat until barely boiling.  Then turn off the heat and  “temper in” the yolk mixture (mix a small amount of the milk into the yolks, then gradually add more and more while you keep stirring until the yolk mixture is hot).  Add the tempered yolk mixture to the rest of the milk in the saucepan and stir.  Allow to cool, and pour through a sieve into a storage container.  The sieve will remove any cooked egg bits and/or scalded milk.  Let the mixture cool.  You can chill and consume as is, or…
Option 1:  Beat the egg whites to soft peaks, and add 1 tablespoon  sugar.  Mix into the cooled egg nog mixture.  You can skip this part if you don’t care for frothy nog, or if the raw egg whites scare you.  Or you can use pasteurized liquid egg whites.
Option 2: Add 3 oz bourbon.  Don’t be afraid of this step, it’s quite good!  Or you could just drink the bourbon while you are making the nog.  That works as well.
Stats: If you use 1% milk, 217 cal per cup or about 110 per 1/2 cup (this is without the bourbon) fat: 6g, protein: 12g, carb: 29g.  * 1 whole cup of this nog is the same as about 1/2 cup of other eggnog and no HFCS!!

BTW per John, the nog seems just thick enough using 1% milk, but it might be pretty thin if you try to use skim.
Thank you to John!

Recipe Tuesday: Almond Joy Granola

Back on the homemade granola wagon!  We had been buying some boxed stuff, and I had received granola from Attune (which I can’t get locally…booo).  I was enamored of the little chips in the Attune granola and wanted to try to recreate this at home.  One thing that I don’t like about granolas, though, is that any chips fall to the bottom and it is hard to keep it evenly mixed.  I came up with a good solution.

Here is Almond Joy Granola:

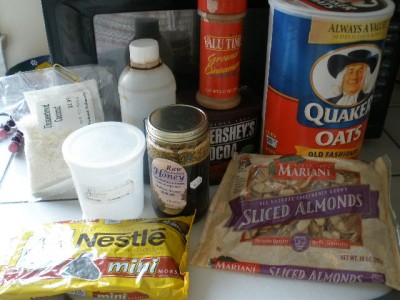
Ingredients:


The dry:

  • 3 cups of rolled oats
  • 1/4 cup of unsweetened coconut (you can use sweetened)
  • 1/2 cup of sliced almonds
  • 1 tsp of cinnamon
  • 1/3 cup of mini chocolate chips

The wet:

  • 1 tablespoon of coconut oil (could use any oil, coconut just adds awesome flavor)
  • 1 tablespoon of water
  • 2 tablespoons of brown sugar
  • 1/3 cup of light honey (or use corn syrup)
  • 1/4 tsp of salt
  • 2 tablespoons of cocoa powder

Preheat the oven to 300 degrees F

In a large bowl, mix together the oats, coconut, almonds, and cinnamon.

In a small bowl, mix the water, coconut oil, brown sugar, honey, salt, and cocoa powder.  Heat this a little in the microwave if your coconut oil is solid.

Add the wet to the dry.

Just keep mixing and mashing to coat all the ingredients.

Spread the mixture out onto a baking sheet.  I lined mine with a silicone mat, but you probably don’t need to do this.

Bake at 300 degrees F for 30 minutes, stirring the granola every 10 minutes.

Pull the granola out of the oven and smooth it out in a single layer.  Then sprinkle the mini chocolate chips over the granola evenly while it is still warm.

The trick. After several minutes, fold the granola with a spatula to distribute the melted chocolate chips.  Just gently, you don’t have to really stir it up.  This will stick chunks of granola together.

Let cool thoroughly until the chocolate has had a chance to harden up.  It will give you clumps of granola with bits of chocolate.

Delicious!  The granola itself is very lightly sweet.  The chips are what make the granola.  It got a thumbs up from John!

Entire batch of granola:
Calories 2,396.0
Total Fat 68.1 g
Total Carbohydrate 348.8 g
Dietary Fiber 31.8 g
Sugars 170.9 g
Protein 39.5 g

I would have to sit down and really measure, but it is probably fairly typical granola at about 200 calories per 1/2 cup.

Recipe Tuesday – cooking a pumpkin!

Okay, I know that most of you (myself included) just buy canned pumpkin already done.  But if you should happen to come into possession of a pie pumpkin, the effort it takes really makes a tasty difference!

I will admit here that I never do this.  John always does the pumpkins, but I happily consume the end result 😀

You can actually cook the pumpkin in different ways: Microwave, steaming, or pressure cooker.  John decided to do the microwave since more people have one of those than a pressure cooker.

Find yourself a large knife and get ready:

Cut the pumpkin in half:

Remove the seeds.  An ice cream scoop works really well for this:

Once the seeds are removed, cut the pumpkin up into wedges to fit into a microwave safe bowl:

Put water in the bottom of the bowl, maybe 1/4 cup or so and cover with plastic wrap:

Put in the microwave and cook on high.  This pumpkin was kind of thick and took about 20 minutes.  This is why the pressure cooker is great, because it is much faster.

When the pumpkin is soft and tender, let it cool for a bit before handling.  Then scoop out the cooked pumpkin from the shell. The same ice cream scoop still works pretty good:

You can use the pumpkin at this point, or you can make it like the canned stuff by putting it in a bowl and applying the spurs to it.

You can also use a food processor for this part if you want.

Beautiful, fresh pumpkiny goodness!

This can be used like any pumpkin puree – like in a pie:

Or pumpkin custard oats:

Give it a shot sometime.  It’s not so hard! 😀

Cranberry Orange Pancakes

This was an experiment that turned out pretty well!  You know normally I make the protein pancake mix with cottage cheese and oats, but I decided on a real flour one today.  And since it is fresh cranberry season – I wanted to incorporate those as well!

The ingredients:

  • 1/2 cup of fresh cranberries, coarsely chopped
  • 1 tablespoon of orange juice concentrate
  • 2 tablespoons of liquid egg whites (or 1 fresh egg white)
  • 1/2 cup of buttermilk
  • 1/2 tsp of vanilla
  • 1/2 cup white whole wheat flour (60 grams)
  • pinch of salt
  • 1/2 teaspoon cinnamon
  • 1/2 teaspoon of baking soda
  • 1/4 tsp of baking powder

In a medium size bowl, combine the chopped cranberries, OJ concentrate, vanilla, egg whites and butter milk.  Combine thoroughly.

In another bowl, mix all of the dry ingredients.

Add the dry to the wet (yeah, backwards, but whatever).

Mix until it just comes together.  Some lumps will be there, but that is okay!

Set aside and heat up your pan on medium heat.  This batter will need a little longer to cook, so lower heat than normal for pancakes so they don’t burn. Trust me.

You will notice as the batter sits for the 5 minutes while the pan heats up this it will become light and airy.

Measure out a scant 1/2 cup (or generous 1/3 cup) for each pancake.  I can only do 2 in this pan.  Cook until bubbles form on the surface.

Again, this is a delicate batter, so take care in flipping them.  Oooops.  Note to self – use wider spatula.

I also learned here was where to use lower heat than usual for pancakes.  The second 2 pancakes got a little dark.

Stats for the pancakes without any toppings.  For the *entire* batch of 4 pancakes:

325 calories, 2.2 fat grams, 55 grams of carbs, 8 grams of fiber, 18 grams of protein.

Nice, eh?  So if you have 2 pancakes, you can enjoy some real maple syrup on them and toasted pecans, like I did.

I think maybe a heartier flour like oat would maybe make the batter a little less fragile.  I am not sure how this would be in the waffle iron, but that could be an experiment for later 😀

Recipe Tuesday – Almond Joy Oats

This is one of my favorite breakfasts to have on a no-added sugar day because it is only sweetened by banana!

Ingredients:

  • 1 small banana (about 6 inches)
  • 1 cup of water
  • 40 grams of rolled oats
  • 5 grams of cocoa powder
  • 1/4 cup liquid egg whites
  • 1 tablespoon of slivered almonds (toasted if you like)
  • 1 tablespoon of unsweetened coconut (toasted if you like)

Really mash the banana into a small pot.  Mash it this much:

Add one cup of water to this and bring to a boil over medium high heat.

Measure out the oats and cocoa powder so it is ready to go:

When the water/banana mixture comes to a boil, add the oats and cocoa powder and then turn the heat to medium.  Simmer for 2 to 3 minutes, stirring well.  I find the more I stir, the creamier the oats get – so don’t just let it sit and boil.  Make friends with your breakfast!  It’s worth it.

After about 3 minutes of cooking, now is the time to temper in the egg whites.  Slowly drizzle in the eggs with one hand while stirring constantly with the other.  For this reason, I really like the liquid egg whites because you don’t get ‘blops’ of egg going in like if you use fresh separated eggs.

You want to stir constantly and go slow in order to avoid cooking the egg white into chunks.  The first time you do this, you can always take the pot off the heat just to get the hang of it.  Once the egg whites are incorporated, cook until the mixture comes back to bubbling and thickens up.  Maybe 30 seconds.

Pour into a bowl and top with the coconut and almonds:

Voila – Almond Joy Oats!

The riper the banana, the sweeter your bowl will be.  Also, the bigger the banana, the more sweet it will be.   Of course, you don’t have to use unsweetened coconut.  I just happen to like it.  You can certainly sweeten this bowl as your tastebuds desire.

This entire bowl is about 360 calories with a good amount of protein and fiber.

Quinoa Cakes

Okay, this is a super duper easy recipe that is customizable in many ways and a great way to use up leftovers.  It’s gluten-free, too!

Quinoa cakes.

Are you ready for a basic 2 ingredient recipe? Cooked quinoa and an egg.  How easy is that?

If you don’t have cooked quinoa already made, just boil 2 cups of water and add 1 cup of quinoa.  Cook on medium heat until the liquid is absorbed.  Voila!

Here were my sweet potato quinoa cakes:

  • 1-1/2 cups of cooked, cooled quinoa
  • 1 egg
  • 4 oz of cooked sweet potato, mashed.

Preheat the oven to 450.

You want the quinoa cooled, as you don’t want to cook the egg.  In a bowl, mix together the egg, quinoa and sweet potato:

This is the ‘batter’

Line a baking sheet with either parchment paper or a silicone mat.  Divide the batter into 4 equal portions and form into a patty.  Place on the baking sheet.  These are wet, so you can mush them in place a bit.

I sprayed the tops with cooking spray thinking I was going to flip them, but I didn’t.

Cook for 15 minutes or so.  The patties will firm up and hold their shape.  Let cool for several minutes before removing from the mat so that you don’t break off the bottom.

This is a very neutral-tasting cake.  I made it this way because John likes his sweet potato anything sweet, and I usually go savory.  He dipped his in maple syrup.

I spread mine with a bit of jam:

Each cake as made above comes out to about 125 calories.

Here is the fun part – leave out the sweet potato and add whatever you want to these!

– Mix in chopped spinach and feta cheese.

– Cook up some diced peppers and onions and add that to the batter.

– Using the sweet potato, add cinnamon, a bit of brown sugar, and some chopped pecans.  This would be a good pancake substitute for breakfast.

– Dice up some cooked ham and shredded cheese.

See how endless the possibilities are with this?

A couple things to note – precook any other ingredient that you add, as they only cook for a short time.

You could also try pan frying these if you want a real crispy crust on them.

What would you put in the quinoa cakes?

Apple/chicken panini without a machine!

Okay, this is probably more of a technique post than an actual recipe post because you can do whatever in the sammies.  I love pressed sandwiches, but don’t want to shell out the $$ for a press or give up any counter space for said machine.    So what is a girl to do?  Improvise!

The key to a pressed sandwich filling is to have something that will glue the halves together.  I chose to use the following fillings in my sammie:

  • Cooked chicken
  • Thinly sliced granny smith apple (used a mandolin)
  • A laughing cow wedge
  • Honey mustard (mixed myself – about 1 tsp)

You will also need 2 frying pans.  One for the bottom cooking, which can be whatever.  The other pan needs to be heavy or you could alternatively put a weight on it.  A cast iron skillet is ideal for this.

While you are assembling the sandwich, put the heavy pan on high heat as you want it very hot:

This is my baby cast iron skillet, since I was just making one sandwich.

You want to heat up the other pan on medium or medium-high heat.

Spread the laughing cow cheese on the whole slice, then layer apples on one side and chicken on the other:

I put the honey mustard in between these layers for the “ooze factor.”  Close the sandwich up and press lightly together.

Spray the cooking skillet with non stick spray and drop the sandwich on:

Spray the top of this sandwich with cooking spray and then put the very hot 2nd skillet on top.  It will sizzle. Please note that if you use cast iron, the handle will be hot – so use a hot mitt.

Side note – you can see the peanuts I was munching on last night in the background LOL! 😳

You can either press down on the handle or put a heat proof weight on this pan if you don’t have one heavy enough.   (I pressed on this because you can see it was a little lopsided). The idea is to meld everything together and heat through.  This is why you don’t want the first pan to be too hot or the bottom half will burn.  Cook for several minutes.  It might depend a bit on what you have in the sandwich and how cold the ingredients are.

If you lubed up the sandwich enough on top, the pan shouldn’t stick to it.  Plate up and enjoy!

The sandwich gets nice and crusty on top.

The key to the panini is “less is more.”  Thinner sandwiches are better so all ingredients get hot.

Alton Brown does a grilled cheese sandwich this way using shredded cheese.

Another favorite combo of mine is cooked turkey/chicken, laughing cow wedge, and cranberry sauce!

What would you put in your panini?

Tuesday Recipe – Pumpkin Cranberry Oat Bars

Pumpkin Cranberry Oat Bars

This is not a new recipe, but I made this up a couple years ago and it may have gotten lost (which it shouldn’t be), so I wanted to give it some love!  These are super duper easy.

Ingredients:

  • 28 grams of whey protein powder (I used unflavored, but you could try a flavored one)
  • 1/2 cup canned pumpkin
  • 2 eggs
  • 1/2 cup lowfat yogurt (plain or vanilla– I happened to have vanilla on hand, just don’t use fruit)
  • 2 tsp pumpkin pie spice
  • 1/2 cup brown sugar
  • 2 1/2 cups of rolled oats
  • 40 grams of Craisins (or dried cranberries).

Preheat oven to 350.   Line a 9×9 pan with a parchment paper sling. This will really make it easier to get these out, trust me.

In a bowl, mix together the protein powder, pumpkin, eggs, yogurt, spices, brown sugar with a whisk.

You want to make sure the protein powder is really well incorporated and the mixture is smooth.  Chop the Craisins smaller and add to the mix.

Then stir in the oats.

Press the mixture evenly into the 9×9 pan and bake for 35 minutes.

These won’t really get brown, they will just firm up – so don’t over bake. Remove from the pan right away and cut into 9 squares.

It’s much easier to cut these when warm.  The pizza wheel – multitasker extraordinaire!  The picture at the top has been cut into 18 pieces, but I normally do 9.

Store in the fridge (if they last that long) and warm up in the microwave for 10 seconds.

Stats with my ingredients for 9 bars:
Per bar: 157 calories, 3 grams fat, 27 grams carbs, 3 grams fiber, 8 grams protein, 54 mg sodium.

I think I will try adding some chopped pecans to this (obviously altering the stats), as I think that crunch would be awesome.

May sprinkling some yogurt chips or white chocolate chips on top after coming out of the oven would be pretty awesome as well!

Easy Carrot Salad

This is a quick salad that I made up, sort of Moroccan inspired a bit.  Instead of having a mayo-based salad, this used Greek yogurt!

For 2 large servings:

  • 10 grams of raisins soaked for 5 minutes in hot water
  • 2 oz of Greek nonfat plain yogurt
  • 1 tsp of frozen orange juice concentrate
  • 1/4 tsp cinnamon
  • 6 oz of matchstick cut carrots
  • 2 tsp of toasted slivered almonds

Drain the raisins.  In a large bowl, mix the yogurt, orange juice concentrate, cinnamon, and the raisins together.  Add in the carrots and mix well.

Top each serving with 1 tsp of the almonds.  If you make ahead, don’t add the almonds until just before serving.

This is lightly sweet from the raisins and OJ.  It’s an interesting combo.  I actually liked it better after it sat overnight as the raisins soaked up some of the yogurt and got even softer.  I can see this amped up more with chopped apples or grapes (or both), and dare I say a wee bit of bacon for a savory aspect?

Stats for each serving (makes 2):

Calories: 81

Fat: 1.2 g

Carbs: 16g

Fiber: 2.5 g

Protein: 4 g

Whole Wheat Pumpkin Scones

These turned out great!  Don’t be afraid of the butter in these.  It’s just really hard to get good scones without some solid fat, but there really is not that much per scone.  I reduced the butter in a typical recipe and changed some of the sugar to brown sugar to help keep in moisture that removing the butter might cause.

Ingredients:

  • 2 cups of white whole wheat flour (240 g)
  • 1 tablespoon of baking powder
  • 1/4 cup brown sugar, packed
  • 1/4 cup granulated sugar
  • 1 tablespoon pumpkin pie spice
  • 1/2 tsp salt
  • 1/2 stick of cold butter (4 tablespoons)
  • 2 eggs
  • 1/2 cup of canned pumpkin
  • 1 tablespoon of milk.

Preheat the oven to 375 F.  In a large bowl, mix together the flour, both sugars, baking powder, salt, and pumpkin pie spice.

Dice the butter into small pieces.  Make sure it is very cold butter.

Add the butter to the dry mixture.

You can use a pastry wire cutter to mix in the butter, but I find that clean hands are your best tool for this job as you get a much better mixing.  You want the mixture to look kind of sandy when finished:

You can put this mix in the fridge to keep cold while you mix the wet ingredients (or are waiting for your husband to return with the milk that you forgot you were out of).

Combine the eggs, pumpkin and milk together and mix well.

Add to the dry ingredients.
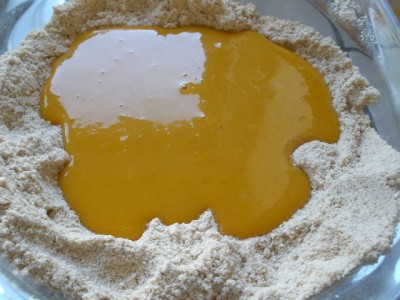
Mix until everything is just moistened and turn out onto a floured surface.  Keep some flour nearby for dusting, as the dough may be sticky.

Using your hands, press and form into a rectangle about 1/2 inch thick.  You probably could use a rolling pin, but why dirty another piece of kitchen equipment?

Cut this in half the long way.  Cut each half into 3 equal pieces, then cut each of those squares on the diagonal so that you have 12 pieces (each half of the above dough will make 6 triangles).

Do try to make them even 😀

Bake at 375 degrees F for 15 minutes.  Do not over bake.

Makes 12 scones.  Nutritional info per scone

Calories: 151
Fat 5 g
Carbs: 23.6 g
Fiber:  2.3 g
Protein:  3.9 g

Topping ideas:

– You can mix together 1 tbsp of neufchatel cheese with 1 tbsp of powdered sugar to make a cream cheese frosting and add only 70 calories and 3 grams of fat to each scone.  Compare 220 calories  to Starbucks Pumpkin Scone at 480 calories.

– Or do like Debby and mix a wedge of Laughing Cow with cinnamon Splenda to top (which would be 35 calories)

– Make fat free glaze by mixing powdered sugar with a little milk.

– Sprinkle the scones with large sugar crystals before baking.

We topped with a sprinkle of crystallized ginger, too.  Awesome!

Enjoy!