Category Archives: home improvement

It’s fall and kitchen doins’!

It’s officially fall! Even though it really isn’t fall LOL! Pumpkins are in the store and they are mammoth pumpkins this year.
pumpkins

The picture doesn’t quite do justice to the size. These have to be 25 pounds. Big enough to wrap your arms around! And they are only $5.99 each.  Unbeatable.  Must have been a good pumpkin crop this year.

We actually put the heat on in our current house.  It was in the low 60s in the house. That’s really too early, but temps are going to drop into the 30s tonight!  Jeez!  Our new house is so solid with brick and cement walls that the temperature seems to regulate better and we didn’t need to turn the heat on yet.

We even had to really bundle up for breakfast riding as it was in the 40s:

WP_20140914_001


Of course, lots of rehab this weekend.  You know how I was saying how progress was inching along? A lot of that is when you do the behind the scenes stuff, it looks like no progress happens for a long time.  This weekend some big stuff got done and we are starting to put in some finishes.  The hardware arrived and it makes me soooo happy!

WP_20140913_001

And the pulls:

WP_20140914_002


I just love it!  It’s called Reed and Ribbon in antique copper. It matches the copper finish faucet set:

facuet

The reason the wall looks like that is that is where the tile backsplash will be and I didn’t want to waste paint on wall that is going to be covered up.

We got the underlayment on the counters and the glue is drying:

WP_20140914_008


Those green cans are fragrance and essential oils for John’s business.  They are 25# cans and great for weighting the counters.  The dishwasher is in and fitted, too.  We were worried the door hardware would get in the way and it just squeaks past …phew!!  I need to do a post on our cabinet hacks, too.  John totally impressed me 😀

Dry fitting of the granite composite sink in the underlayment:

WP_20140914_005

New light fixtures.  I fell in love with the schoolhouse lights a while ago and knew I wanted them in this house.  One for the kitchen:

WP_20140914_004


A smaller one in the nook:

WP_20140914_006

Of course, when I removed the old fixture it shows a ring and now I have to paint the ceiling.  Always something extra…

Let there be light!

WP_20140914_009


As a reminder, here was the old kitchen:


WP_20131126_006


While we worked in the kitchen, I had my mom work on stripping wallpaper in the dining room.  That’s the job du jour for anyone who dares set foot in the house LOL!  We pay in lattes, so it’s all good.

On the agenda for this week will be building the wooden countertops!  Woo Hoo!


Rehabbing and riding

Saturday was spent doing rehab, of course!  It was really, really humid and painting was on the agenda for me.  It took forever for the coats to dry LOL!  Getting closer to finishing the cabinet doors.  There was cleaning the doors, patching damage, priming and 3 coats of paint.  I want these to last a long time.

cabinets

This color is by Behr and called Moonlight White.  It is a very light cream color.  Its’ going to brighten up the kitchen so much!

I started more trim painting in the kitchen as well.  One thing that really irritates me?  When people paint over hardware:

WP_20140905_007


I had to scrape the paint off the get the screws out and then sand down the big pain blops underneath.  The good news is that the electrical is done!  We have an electrician that we normally use when we need one, but he is ill with cancer and not taking on more new work (we wish him well). No one returned calls for an electrician, so John decided to work past his problem and go from there – and he did it.  What he did was to run the electric underneath the upper cabinets.  He put one outlet into the wall, but is is really difficult to cut holes in concrete, even with a hammer drill and we didn’t want to risk the integrity of the wall.  I am happy enough with the results because those ugly boxes are mostly hidden.  He also wired up for a new garbage disposal!  Yay!  BTW, he recommends this book to make sure you are following the codes you need if you want to do electrical:  


We also worked on the base cabinets and getting them ready for countertops.  We still need to get a sink base cabinet, but we will pick that up when we get the flooring this week (!!!).  I spent a lot of time scrubbing the cabinet bases.  Seriously – the people that lived here really loved their condiments.  They were splashed everywhere on the ceiling, underneath the cabinets, all over the doors.  At least I hope it was condiment Ewwww…

I started putting on some primer. Here is progress:

WP_20140906_004

I was struggling with ideas for a backsplash.  We will have wooden counters and I while I like the look of glass tiles, they are kind of trendy and I want something a little more timeless.  Then I found the perfect tile.  Marble subway!

WP_20140907_006

I wanted marble countertops, but they are just soooooo expensive and out of our budget, not to mention I don’t know if I could deal with the maintenance of marble.  Then I thought I would do it for the floor, but the tile people tried to talk me out of that for stain reasons.  So – I do get my marble after all!  Hee hee!!

John and I both took Sunday off from the new house.  We needed a break from rehab.  Plus we had to clean the house up for our open house…aaaaand it’s the start of the NFL season.

John’s bike is out of commission right now, so I rode to breakfast by myself.  Lonely early Sunday road:

WP_20140907_001

It was a really nice morning for biking, too. Cool  and sunny.  Just perfect.   I got to Coffee Planet and there was someone waiting for me there :

WP_20140907_003

😀

Breakfast!!

WP_20140907_004

After eating, I went out to finish the usual Sunday ride which is 20 miles.  John went grocery shopping LOL!


The rest of the ride was pretty much like this:

WP_20140907_005


It felt really good to ride.

We got the house super clean for the open house, but only 1 party came through, unfortunately.  I don’t think it helped having the open house scheduled for kickoff time for the NFL season…

Tonight is time for the Broncos to kick some butt!!!!


Kitchen update and a bit of riding

Man that weekend went fast.  I don’t know how much work I will have Monday for Labor Day since I now work 2 jobs.  I imagine there will be at least some work. Clinics will be closed, but the hospitals are open for all those emergent appendix removals 😀

Anyway, we had thought about a long ride on Saturday, but had forgotten that John reserved a moving truck for Saturday for his business  – so that put the kibosh on a Saturday ride.  Oh well.  

He went and picked up the truck and loaded up all the fragrance and essential oils and other stuff to bring over.  I went to the house to get to work on things.  I brought the bench over with me!  

bench;

Furniture – woo hoo!!!  I ate my lunch in this seat 😀

WP_20140830_005


Saturday was mostly about painting the nook area.  We have an electrician coming out on Tuesday, so we don’t want to do any painting or anything in there until we find out what needs to be done so we don’t have to redo anything.  However, the nook is all ready to go.  I got the screens out of the windows and tested them out.  They work on a chain system to open, which is charming:

WP_20140829_019

I am not sure why the walls look yellow in this picture because they were whitish before painting.  My phone sometimes will put in weird colors for some reason. That lever to the right turns and rolls the chain back inside the window to close it.  We need to repair the screens before they go back in, but that also gives me a chance to paint the inside trim.

The midafternoon was spent unloading the moving truck.  Ugh.  I need to remind myself that I never want to move again – and we still have our stuff to go!

Sunday we were going do a long ride, but the weather decided not to cooperate.  We started with our usual ride to breakfast.

WP_20140831_001

We went to Panera for a change, which is all road riding.

WP_20140831_002

It was fairly gloomy out and we checked the radar over breakfast and decided just to go home since rain was on its way.  Sigh…

Not like we don’t have things to do on a rainy day, right? Anyhoo, here is the pretty green color of the nook:

WP_20140831_005

I wish it was sunny, but these were taken today when it was raining…

WP_20140831_011

.

A lot different than this!

WP_20140403_002


No more wallpaper!  The nook just needs the baseboard trim painted, flooring and a new light fixture and it will be pretty much done.  Plus replacing the radiator cover.  I know you are all thinking it looked better before, but just wait!

Now it’s time to bake a cake.  My niece’s birthday is tomorrow and she requested the same cake
I made for John.  It was quite the hit!

Eating during the rehab

So, can I say it’s been busy around here?  I have started working with my new second job.  My hope is to do both part time until I transition to just one.  However, I am having to juggle a lot of balls right now. I don’t know if I have ever mentioned it, but I don’t even know how to juggle tennis balls 😀

So, evaluation of priorities has to take place.  The first things to go?  TV watching and my guitar practice.  I am not Segovia, so missing a few weeks of practice won’t really hurt the world.  I do love practicing, though.  I have done some here and there and my hands are pretty sore from doing rehab work on top of my daily typing.  I don’t watch a ton of TV, but I missed some preseason football games in order to do the ‘must do’ stuff.

With being really busy, we obviously aren’t cooking gourmet meals and all that. It’s been pretty basic stuff.  We have started to rely on more freezer foods like veggie burgers and the like because they are fast.  It’s too easy to want to say “Let’s pick up a couple slices of pizza on the way to rehab” and I don’t want to get in that habit. We have been treating ourselves a little bit afterwards with coffee or yogurt sometimes, but I am keeping an eye on serving portions with that.

I have been eating more of these:

WP_20140819_003

In fact, my dinner last night was a Luna bar because of new work stuff going well into dinner time, which I was in tears over because it was so overwhelming ( but that’s better now). John had to leave the house early, so he wasn’t able to make dinner. It was all I could do not to stuff my face with whatever I could find, but I am focusing really, really hard on listening to hunger cues instead of comfort cues.  So, while a protein bar isn’t perfect, it’s better than M&Ms.  Then later I was able to have some fruit and a more nutritious snack.

Rehab also means packing meals for the house on weekends, like so:

WP_20140823_010

That’s apple topping for my yogurt in the plastic box.  We don’t want to drive home 5 miles to eat and come back and, again, I am not wanting to get in the habit of takeout, so that means packing something easy.  Not to mention something that doesn’t need reheating since there are no appliances in the house yet!

One thing that is interesting is that during the first 2 weeks of rehabbing, I lost 3.5 pounds.  Only 6.5 to go to get rid of my 2014 stress weight gain.  I feel like I should capitalize that LOL!  Weight loss is not my priority now – it’s to not gain, but I certainly will take any loss.  I know that is because of the hard physical work I am doing that helps, plus not being at home to snack.  It’s taking some real concentration and effort to not take the easy way out, but I am determined.

The kitchen keeps getting more and more down to the basics:

WP_20140826_003

Once the electrical is done, we can start putting it back together.  We have a call in to a couple electricians, but John wants to look one more time at it 😀 And don’t worry, none of that stuff is live, all those circuits are off. Safety first!

Night shot of the floors after semigloss poly:

WP_20140826_004

They still have all that variation in color they had before. They just look cleaner 😀  We can walk on the floors now, but can’t set stuff on them for a couple more days.

More house progress.

We are on Day 11 of the rehab?  It’s all blurring into one LOL!   This weekend had some progress and some setbacks.


First off, the wallpaper is pretty much gone in the kitchen!  There are just a couple bits of the backing paper that I didn’t get off near the outlets John was working on this weekend.  However, there is a lot of glue on the walls I have to get off.  That’s annoying.

Here is the nook area all empty:

nook

The bird cage is something I brought from home and hung up on the hook as predecorating 🙂    I think I will leave it there and fill it with some trailing greenery (probably fake).

I did find some broken plaster when doing the wallpaper:

WP_20140822_008


It was a crack, but to repair properly, I had to take off any loose stuff, which made a big patch.  You can see concrete behind the plaster.  This house has concrete walls, not lathe or dry wall, which makes doing normally easy stuff hard. Like electrical.  John got a hammer drill and got one outlet sunk in the wall, but he is really have a hard time with the others than have longer lines that need to be channeled into the concrete with conduit.  He was really frustrated today and I think we may leave the remaining electrical boxes on the wall.  John wanted to make me happy by sinking them, but it isn’t worth seeing his frustration over it.  I want him to enjoy doing the rehab more than that.  So,  maybe I will decorate them or something. 😀

Here is the rest of the big mess with the wallpaper gone:

WP_20140822_009


We also got rid of that scalloped border over the window and what a difference that made.  Shelley got me thinking about a pendant light over the sink the other day.  We hadn’t really thought about the lighting yet, but did a fun browsing trip last night.  I think I like this pendant:

WP_20140823_016

Our walls are going to  be a pale green, so I think it will look good.  We also think we have a sink picked out:

WP_20140823_014


It’s a granite composite sink.  I don’t want stainless. I want a white sink, but acrylic won’t hold up very well (IMHO).  Cast iron was an option, but what a heavy sink!  So, we saw the composite and liked the look of it.  Might be a different shape, but it will be white.
I had to work on the floors this weekend, too.  Normally I would leave these until last, but we have so much wallpaper to remove that we will be doing it after we move in and I wanted the floors done while the house is empty.  So, I rented a sander while John worked on electrical and moved some business stuff into the basement.  This is the worst part of the floor.

WP_20140823_004


This machine is really, really heavy.  It’s an orbital sander, which I wanted to try because you can’t damage the floor like you can with a drum sander.

WP_20140823_005

Badass.  Or is that safety first?

I did 3 grits of sandpaper over the floor.  It was a tough day.  I had to do it all in one shot, though, because we had to get the sander back from rental.   My shoulders were really tired.  Again, strength training has helped me so much to recover from this hard work!

WP_20140823_013


The bad part looks much better now, especially for a 95-year-old floor!:

WP_20140823_012

I patched some of the big scratches, then sanded that down and started putting down poly.  It will take a couple days to get that done.   So much work to do.

We did get our normal Sunday breakfast bike ride in.  We ride 20 miles every Sunday it isn’t raining.  John and I made a promise that we are going to take next Saturday off from rehab and do a Lake George ride.  Now watch it will rain LOL!


Kitchen progress

It’s hard finding a balance between work, rehab and quality time.  Phew.  We still are muddling through that.  One thing I have to keep doing is exercise.  Yes, the rehab stuff is functional exercise, but it can’t replace the bike!

I have to say that I love how much easier rehab is when you have a good strength training routine already in place.  I am not sore after doing anything and it enables me to work longer.  Not that I am not tired, because I am, but not sore – which makes all the difference in the world as far as motivation to keep going.

Slow progress is being made.  We got the hot water tank and lines tested and no leaks – YAY!  Now to actually turn on the hot water heater and the heating system.  We have a professional coming out to do that on Wednesday to make sure that is on the up and up.  Once that is up and running, I will feel a lot better.  That’s the last really big unknown.

Our house is now on the market.  Not sure if it will sell or not this fall.  Obviously we hope so, but we are willing to take it off the market and relist in the spring when there is more activity.  I don’t really want to own 2 houses that long, but I can’t control the market, as much as I would really like to!  

I moved some furniture around trying to make the living room inviting with my mish mash of styles.

WP_20140817_008

Trying to hide our old couch 😀  We are not taking that with us.  I have 3 of these chests, which are kind of boring, but useful for storage.  I painted this one and brought it down from the bedroom.  It still has our sheets and blankets in it LOL!  

With having a hair ejection machine in the house, I decided I didn’t want to be vacuuming the area rug daily, so we rolled it up and took it to the new place.  That’s why I brought down the chest because the room was looking like everything was pushed to the edges.

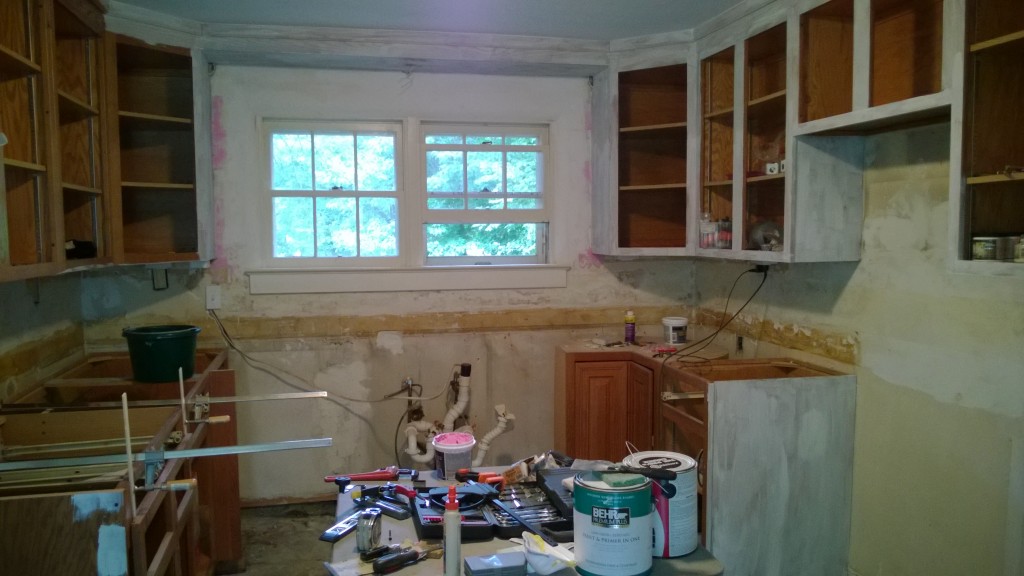
You know how I say things look a lot worse before they start looking better with rehab?  Check out our kitchen!

WP_20140819_005


This was progress for tonight.  Countertops are gone.  We will be pulling out that base cabinet with the plumbing as it is not salvagable, but all other cabinets are good!

The next step is seeing how hard it is to sink outlets into the cement walls.  Finish up wallpaper and then we can start putting the room back together.  That’s the fun stuff.

My mother came over and helped strip wallpaper in the kitchen last night and tonight, so we treated her to some Sweet Frog!

WP_20140819_006


We are willing to bribe people to help 😀

Rehab progress

Where was I??  Oh yes, rehabbing.   I never even got in a Friday What’s Blooming post!  It’s just been a bit busy around here 😀

Now that we own the house, it was time to see all of the unknowns about the house.  This house has had no water, power or gas for over a year in it, which is a little scary.  So, these systems will get tested slowly.

Friday was probably the most frustrating day.  The electrical was turned on Thursday, and that went well.  We had the water turned on (only cold right now) and found broken pipes right away.  I figured we would have problems with either the electric or the water, and hopefully not both.  Turns out it was the water.  

We capped one leak and tested the water again and got water pouring out of the ceiling in the basement.  John was pretty freaked out, but my last rehab had broken pipes, so it wasn’t terribly surprising to see that.  Unwanted, but not surprising.  We pulled down some of the ceiling and found that leak, which was just the line to the outside, and we were able to close that off with the shut off.  We were pretty tired that night and called it a day.  Not a great start.

We took a ride Saturday morning.  I have to tell you that my insomnia has been terrible all week.  I have been getting about 5 hours a sleep for the past week and it is really taking its toll.  I took a picture and noticed how tired I look LOL

WP_20140816_001

Saturday was spent fixing pipes and me pulling some carpet.  There is only carpet on the stairs and hallway upstairs.  It was really, really nasty.

WP_20140814_011


I knew there was wood under it, but didn’t know what shape it was in.  Finally something good!

WP_20140816_005


Once the leaks in the basement were fixed, we started opening the shutoffs to the first floor powder room.  I do have to say that the bathroom smelled really, really bad and it turns out that someone left a ‘present’ in 2 of the toilets.  I have an iron stomach, but this almost made me lose my lunch.  The not fun part of this, I have to say.  Anyway, the toilet needed a new wax ring because there was a leak, so while John continued fiddling with plumbing, I took off the toilet and cleaned it.

WP_20140816_003


By the way – buy stock in disposable gloves because stores are going to need to restock 😀

Got it put back together and we have a functional bathroom!  Felt good to have some success.

WP_20140816_004


Wallpaper removal in this room some time in the future.  It’s everywhere!!

Rehabbing work goes in fits and starts with progress.  Somethings go way faster than expected and some things you just can’t believe how long it takes.  Like removing this microwave. Someone had cut the power cord to this as well, so it wasn’t even functional.  

WP_20140816_009

For real, this took over an hour to get out.  We had some instructions we found online, but it was missing a key point of hidden bolts.  Then we finally got it out.

WP_20140817_003

Sunday was a ton of wallpaper removal for me, along with putting cold water into the upstairs pipes and testing those, which haven’t leaked that we have found, thank goodness.  We also filled the hot water tank, even though we don’t have the gas turned on, at least the tank doesn’t leak.  

Here are some nicer pictures.  This was our snack on Sunday.  John was out and brought back coffee and a cookie to split.  Eaten in our dining room 😀

WP_20140817_002


This is the view of the garden from the dining room:

WP_20140816_007

I can’t wait until I can get out there and work.  I don’t know if I will get much done this fall in it.  Depends on how the inside goes.

I did the kitchen video the other day, here is the dining room and living room.

I really wish I could just take some time off from work to get stuff done, but I don’t get paid time off and with owning 2 houses and $$ needed for rehab, it’s going to be evening work on the house (or daytime if I run out of work!).  I’ll try not to make the blog completely about the new house, but we will be eating, breathing and sleeping it for a bit 😀

The finished settee!

Those of you on FB saw my finished settee, but thought I would share the details of the project.

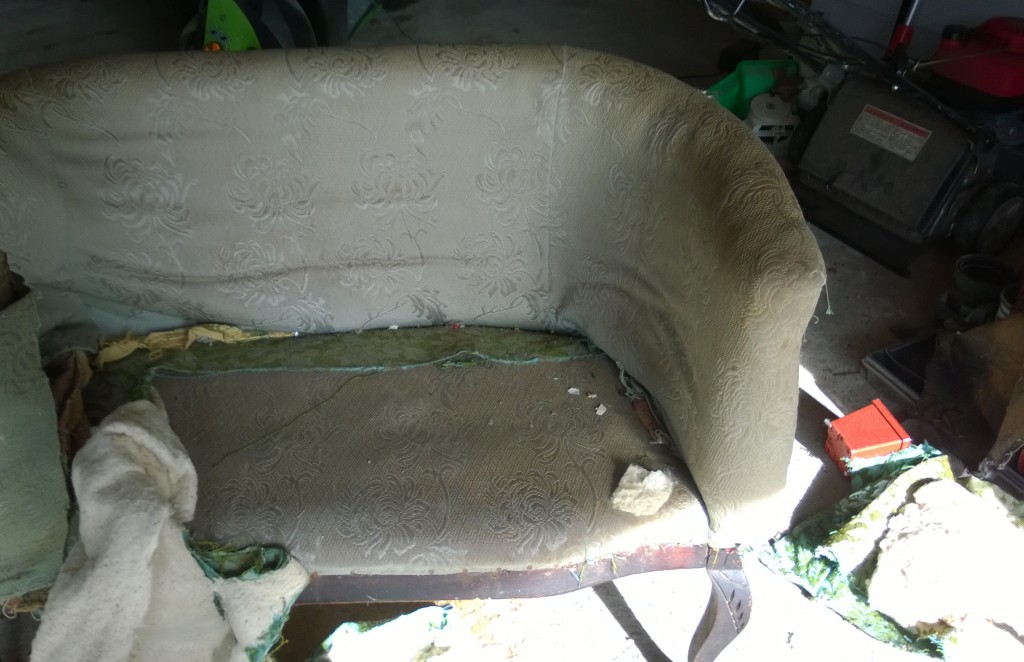
Just a refresher, here was the piece when I bought it for $18.

settee


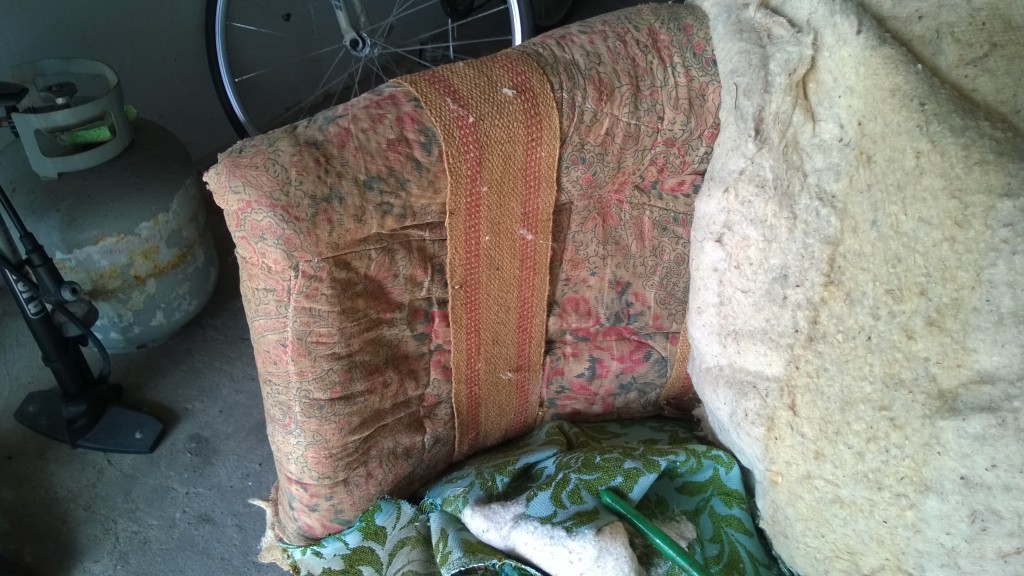
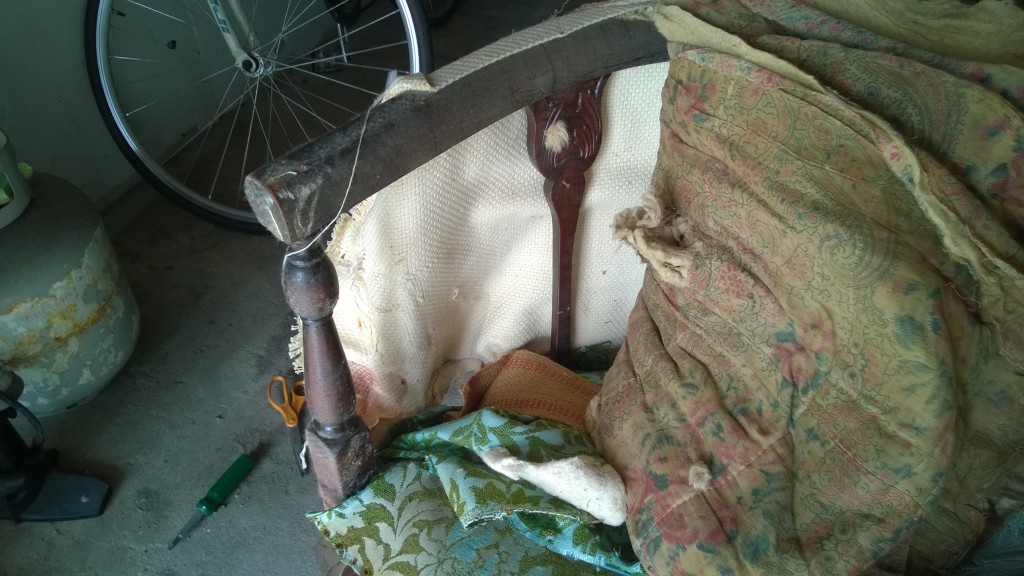
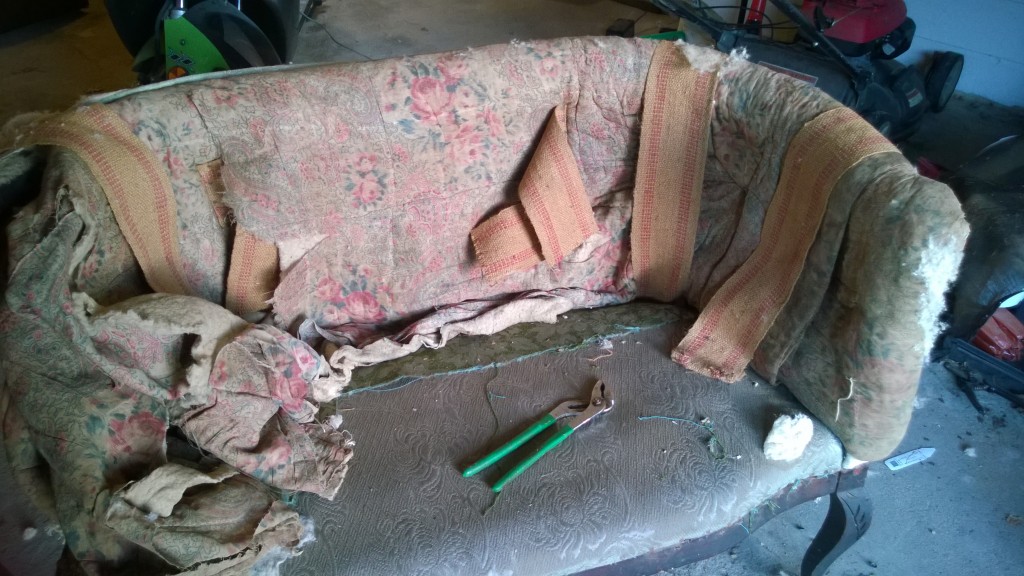
After I stripped off the 3 layers of upholstery, I had the original piece.

WP_20140620_022


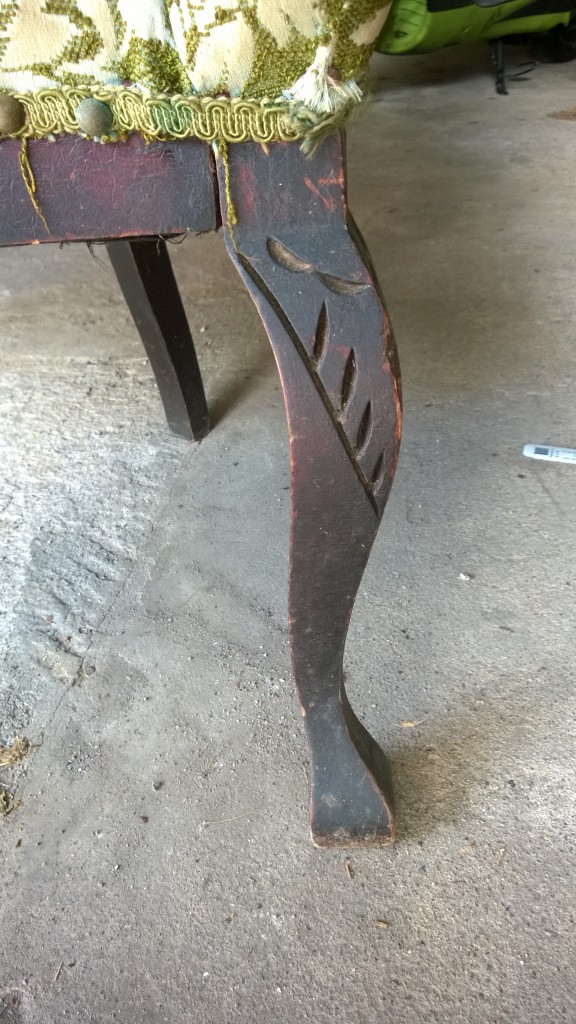
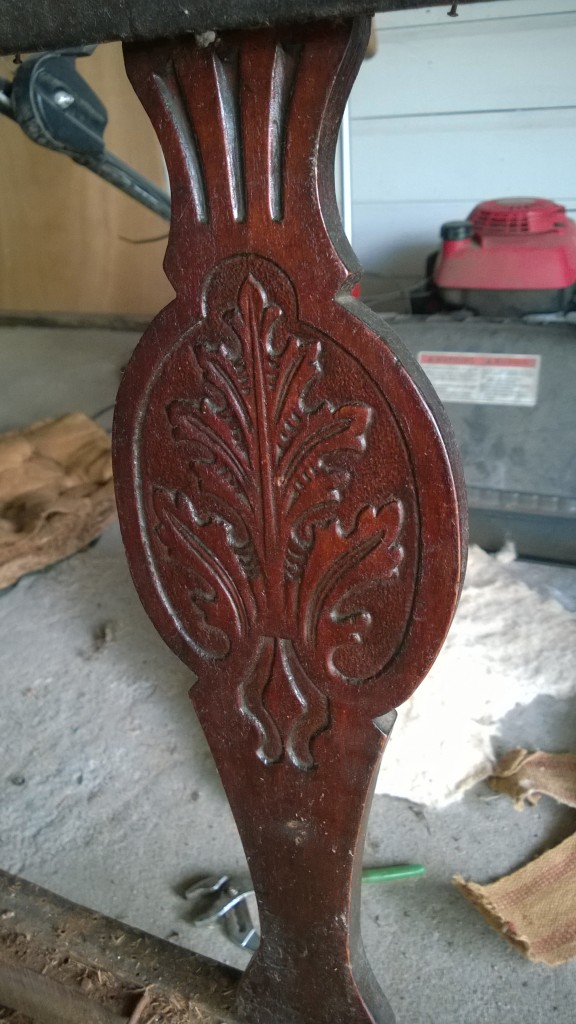
Then I spent a good amount of time stripping and repairing the wood as best as I could. There were so many tack and nail holes, as well as splits in the wood that it was never going to look new.  I can’t understand why someone would cover up the wood in the first place.  Kind of like people who put carpet over perfectly good hardwood floors.  And if any of you have done that, please don’t tell me.  😉

The seat was stuffed with hay!  Icky.

WP_20140621_001


Upholstery books say to keep the stuffing of furniture if you can, but there was no way I was keeping this.

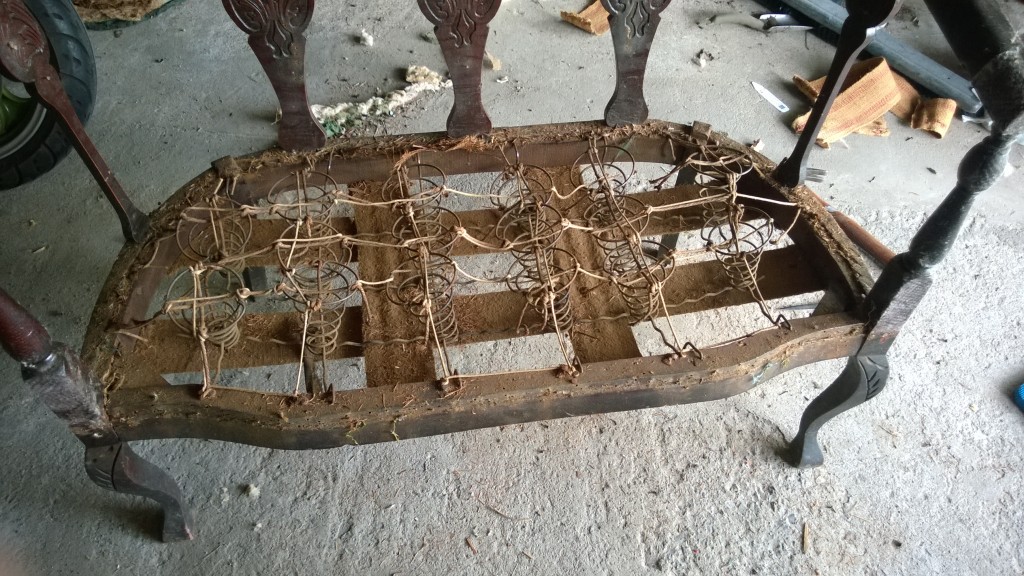
All the old springs.  Instead of being attached to the webbing, they are actually attached with metal – which meant I could keep them and just retie them into place.

WP_20140621_005


After stripping and patching what I could, I realized that it wasn’t going to look good just stained, so I opted to paint it. I used 2 cans of rustoleum black glossy enamel spray paint, which allowed all the wood detail to come out.

It still has dings and scratches in it, but it’s an old piece – so we will give it a break.

WP_20140629_005

Then I had to tie down the springs. The idea is to make the springs even in the shape of the seat.  I read a few books and websites about tying down the springs.  Of course, since my springs were attached to a metal frame, it was different than the books showed, so I had to wing it a little bit.

WP_20140703_002

This was about 3/4 of the way through tying. I did more because I was paranoid LOL!

Then time for the good stuff.  A layer of muslin over the springs as a cover.  Then I used the old seat to cut a form for the padding:

WP_20140704_013

I was so glad to throw out that nasty old seat once I traced it. Nas-tay.

WP_20140704_015

Then I put a layer of batting on top and held it all in place with another layer of muslin.

WP_20140704_019

Now I could work on it inside since it was clean and the messy stuff was done.  I ended up using upholstery tacks to attach everything but the dust cover on the bottom. The wood was very hard and it was too hard to get staples to go through the cloth and the wood.

Then I did the pretty fabric.  No pictures of this because I was busy with both hands. I took a long time putting the fabric on because I would put in a few tacks, ponder the piece, put in a few more, make sure I was going straight, etc. The hardest part was going around the front corners and keeping the fabric tight.

And done!

WP_20140709_007


I adore this fabric so much!  I bought it online at Brick House Fabric.  They have really unique fabrics there.

I was thinking I would get some trim to cover the tack line, but I kind of like it. The original piece had the tacks showing and maybe I will just leave it.  It will get left until I get another coupon from JoAnn Fabrics and see if I want to buy any trim.  Always on the hunt for a bargain.  The total cost of the piece was $72 and change, which includes the $18 that the settee cost in the first place.  The most expensive thing was the fabric at $24 a yard (plus $5 shipping).  I got almost everything else half price at JoAnn’s with sales and coupons – so that made me happy!

The piece isn’t perfect, but it is pretty comfy, I have to say. I think for my first upholstery project, this was a pretty good one to do and probably better that I didn’t have as much actual fabric coverage to do as I first was expecting when I got the piece.

Next upholstery project? WP_20140622_011

Although not for a while LOL!

Settee update

So, I showed the picture of my settee that I picked up for $18 at auction with the thoughts of reupholstering it. Even though I said I wasn’t going to buy anymore furniture before we moved, right? Promises, promises. $18, people! How could I not get it?

settee

I liked the shape and the wood detail and figured with a new covering and restaining the legs it would be pretty cool to put in the little room that will be off our new living room.

WP_20140620_006

I was a bit concerned because this was a little more than I was thinking of doing for my first upholstery try.  Turns out I didn’t need to worry…

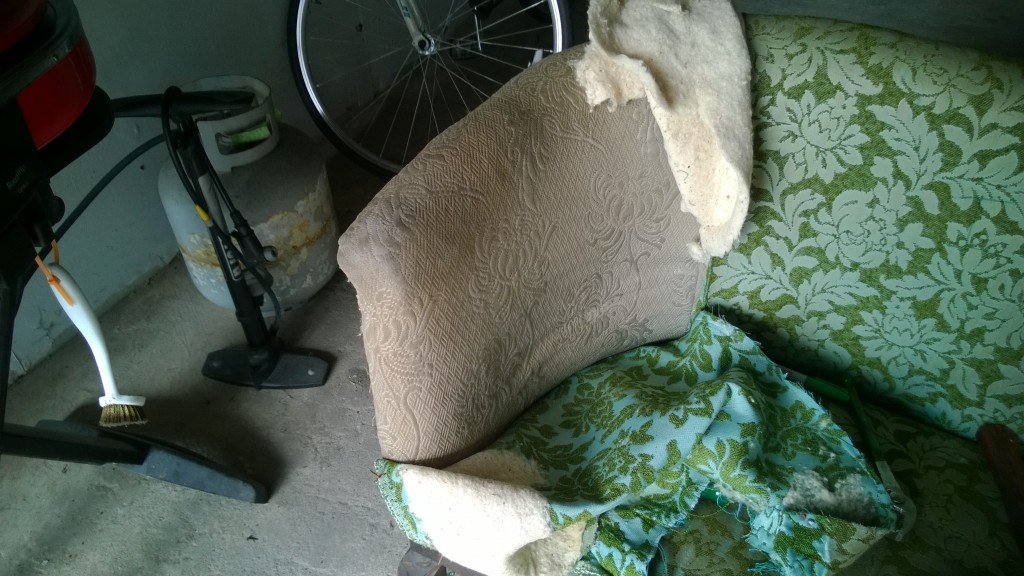
I used a marker and wrote a number code on all the pieces so that I could use them as a pattern for a new cover and actually remember how to put it back together.  Then I carefully pulled apart the fabric and saw another layer under it.

WP_20140620_015


Okay then. More work to do!

WP_20140620_019

So then I peel off that layer and I see this:

WP_20140620_017

By this point I was all WTF? I also noticed when I grasped the piece that it felt like a wooden frame underneath that had a shape to it and I began to suspect that I had a totally different piece than I thought.  So no, Jeannie, it wasn’t a bag of money I found (how cool would that have been!?!?).

I pulled this corner off to see and I find this:

WP_20140620_018

By this point, the dust was pretty bad from all this old fabric and I was wearing a mask. 

WP_20140621_002

I think the patient will live.

WP_20140620_020

By this point I was just ripping off the fabric because I knew I wasn’t going to be putting it back together the way I found it.  I got everything off except for the very original seat cover.

WP_20140620_022

This was the settee’s original form and it looks very cool. I did take off the last cover with it’s padding (straw!). I saved that for a template to recover the seat. 

WP_20140621_004

Please excuse the old girl – she was very dirty in this shot. I can save all the springs. They just need to be retied.  So, what I thought was going to be a big upholstery project is turning into a stripping and staining project.  I think you can see a bit in this picture all the nail and tack holes from 3 layers of fabric on this. Some of the wood around the seat that will be showing is not in good shape. I am going to try to fill the holes and stain them, but I may actually have to paint the wood because I don’t know if all the patch work will take the dark stain and look good. I have to wait and see.

I can’t believe someone didn’t like how this looked and covered it up.

WP_20140621_007

So, I have spent time this week with varnish stripper and a tooth brush working to clean it up. Hopefully this weekend I will patch the wood and see if I can stain it or have to paint it.  If I do paint – it will be gloss black.

I told John I should do furniture flipping instead of house flipping 😀

Dresser Redo Complete!

It’s really nice to have a project idea in your head and have it come out like you imagined. A lot of times things I plan end up way different than the initial vision, but the dresser worked out just right!

Here was the before:

dresser

I did this with my own version of chalk paint. Again, that was using calcium carbonate (bought online) mixed in a 1:2 ratio of CC to paint. So, for these sample jars (8 oz) I used 1/2 cup of calcium carbonate plus 2-3 tablespoons of water. Mix the water and calcium carbonate, then mix in the paint. The thing I love about making my own is that I can buy a small sample color and not have to purchase a whole quart of chalk paint (super expensive), which allows me to have multiple colors on the same piece.
WP_20140520_011


I decided to go ahead and prime the dresser with Bullseye primer just to make sure the paint would adhere and also because I was going from dark to light and only wanted to do 2 coats of paint.  I took the drawers out and took them to another room to paint. I will be honest and tell you I didn’t even take the clothes out LOL. I am such a risk taker 😀  I put the dresser frame onto some pieces of wood to elevate it and painted that right in the bedroom.  

I got some great hardware from Cabinet Hardware Designs on Ebay.  Their prices are amazing!  I got 3 pulls and 4 knobs for about $15 with shipping.  Score!!!   The only annoyance on the hardware is that the screws that came with the pulls are too long:

WP_20140604_001

Now I have to buy some nuts to fit in there – or cut the screws.  

Once the painting was done, it was time to do the graphic on top.  Since I was doing a large size, it was going to be to hard to do an inkjet transfer, which I did with my little table since it only took 1 sheet.  So, I tried a different method I researched.  First, I took the graphic from The Graphics Fairy and enlarged it using Block Posters.  I played around with the sizing and decided I didn’t want the graphic to be too huge on top.  This gave me 7 sheets of paper, which I taped together and measured placement on the dresser.

design


Then I took a soft drawing pencil (you could use chalk) and rubbed the back of the design all over with it.

WP_20140530_003

Then I flipped it back over and taped it in place. You need to tape it so that it won’t move around when you are tracing.  The next step was to take a pen and trace the outline of everything.  This was fairly painstaking and I am glad I did not have a hugely ornate design.

WP_20140530_004


The beauty of the chalk paint is that it takes any kind of transfer really well.  When I lifted the paper up, I had the design transferred in place.

WP_20140530_005

Neat, right?  I was stoked that this actually worked LOL!  Now I filled in the letters with a fine Sharpie.

WP_20140530_006

I would have like a more dark gray color, but that would have meant using paint and a brush and since my skills in fine painting are on a preschool level, I decided to live with the black.  This took some time to do – maybe an hour?

dresser top


It’s not completely perfect. I had a smudge, but it’s barely noticable.

WP_20140530_008

Normally I like to do poly on things, but I only had spray satin. I didn’t want to drag the dresser downstairs and outside to spray, so I decided to go ahead and try waxing the piece instead since I had some.

WP_20140531_055

I tried waxing before, but it was on latex and didn’t work well.  The beauty of chalk paint is how well it takes the wax. Nice to learn these things.  I did 2 thin coats of wax on the drawers and sides and 5 thin coats of wax on the top for extra protection.  Note – I tried putting wax over the sharpie on a scrap piece of wood to make sure it wouldn’t smear, which it did not, obviously.

I love how it came out!

Painted dresser


With buying the paint samples and hardware, this project cost me about $25.  I already had the calcium carbonate, which still was only $5 for 5# and I have it for future projects. So even if you count that, it was $30 for a fun new dresser!

However, I do need to buy a new clock.  This one just doesn’t go with the dresser LOL!

WP_20140604_005