Category Archives: recipe

Banana Bread breakfast pudding (gluten free)

While I am resting up from our 88 mile ride and having a boring day, I figured I would entertain you with my banana bread breakfast pudding!

This is a take on the other gluten free pumpkin cake.

Ingredients:

  • 2 egg whites (or 1 egg)
  • 1 ripe banana, 6-7 inches
  • 14 grams of coconut flour (2 tbsp)
  • 1/4 tsp of baking powder
  • cinnamon

In a bowl, mash the banana until it is liquidy.  The riper the banana, the easier this is and the sweeter it is.

Then add the egg whites and cinnamon

And mix well to combine.

Normally I don’t sift coconut flour, but the brand pictured above is a little clumpy, so I like to sift it to keep lumps from happening.  I have a tiny little strainer that I just plop over the bowl and add the coconut flour and the baking powder to:

All sifted and pretty.

Now mix really well.

Pour into a small baking dish.

Now you could microwave this for a couple minutes, but it really is much, much better baked.  I popped it in the toaster oven at 350 degrees for 20 minutes.  You could also put it into 2 muffin cups and reduce the baking time (not sure by how much, but start checking at 12 minutes).

I comes out beautiful and puffed up:

Super moist and delicious!

You can top it however you like.  I, myself, love coconut butter and a drizzle of chocolate syrup:

Or even some peanut butter and jam!

This is easy to make ahead and reheat for mornings on the go.

Nutritional stats for the entire cake (no toppings):

Calories: 182

Fat: 1.5 g

Carbs: 33 g

Fiber: 9 g

Protein: 11 g

Linking this post to Fat Tuesday Forager Festival!  Check out other real food recipes.

Gluten Free Pumpkin Mini Cake

I have been playing with the recipe over the weekend and since it involves my beloved coconut flour, I was smitten right away.

I slightly adapted this recipe from Smoothie Girl.  It is quite tasty and very moist.

  • 2 egg whites (or 56 grams of liquid egg whites, 1/4 cup)
  • 1/4 cup pumpkin
  • 14 grams (2 Tbsp) coconut flour
  • 1/2 tsp baking powder
  • 1 tablespoon maple syrup
  • 1/2 teaspoon of cinnamon

Mix all of the ingredients really well in a microwave safe baking dish.  It should be small, on the order of 4 inches or so – like this:

I like the flat-bottomed dishes so it cooks evenly, but you can use whatever.

Put all of the ingredients in a small bowl:

Mix really well.  You will need to mash it with a spoon to incorporate the coconut flour (unless you sift it, which I am not inclined to do).

Spray your cooking vessel with nonstick spray and spread in the batter.  smooth it out evenly as that is the shape it will come out in!

Again, my hand is in there for size reference.

Pop in the microwave for 2-1/2 to 3-1/2 minutes.  This will depend on the size of your bowl.  You want it cooked through to the middle.

Let cool for a couple minutes (or heck, a long time if you want).

I topped mine with coconut butter and a bit of peach jam:

This comes out very moist and not rubbery like a lot of microwave protein cakes are.  It is the coconut flour.  That magical ingredient!  This is lightly sweet.  Deb makes hers with stevia, I think, but I don’t do sugar substitutes as most of you know.  So it’s real maple syrup for me!

Stats for the entire cake:  Calories: 168

Fat: 2 g

Carbs: 30 g

Fiber: 9 g (!!!)

Protein: 11 g

If you use 1 egg instead of the egg whites, up the calories to 200 and the fat to 7 grams.  I use the egg white version when I want to top it with fat (hello coconut butter!).

This lasted me for the whole morning when I added my 2 cups of coffee.  The coconut flour soaks up a lot of liquid in the tummy 😀

By the way, I found a better price on coconut flour on Amazon.

Azukar Organics Natural and Organic Coconut Flour, 16-Ounce Bags (Pack of 6) This is 6 one-pound bags for $18.37 – sweet!  Guess who has 6 bags in her new pantry now :mrgreen:

Pampered with protein muffins!

I took a chance and biked to the gym today. The roads were wet and it was cloudy, but I say “heck with it!” and biked. I knew the rain was supposed to end this morning anyway – And it didn’t rain!

Exercise Set/rep/weight Muscle worked
Stiff-legged Deadlifts 3 sets of 10 at 65# Lower Body
Cable Squat to Row * 3 set of 10 at 50# Full Body
Dumbbell Pull Over 3 set of 10 with 20# DB Back
Horizontal Wood Chop * 3 sets of 12 each side at 20# Core
Calf Raise 3 sets of 12 at 110# Calves
Barbell Bench Press 3 sets of 8 at 55# Chest
Triceps Pull Down * 3 sets of 12 at 30# Triceps
Hammer Curl 3 sets of 10 with 12# DBs (24# total) Biceps
Upright Row 3 sets of 10 at 30# Shoulders

It was pretty humid in the gym with the doors open. The * is all the exercises I did on the cable machine. Going on T/TH means the cable machine hog usually isn’t there, so I could get on there and do my thing!  I am thinking of actually getting some more weights and moving my workouts to home in August and not dealing with the gym anymore.  I may as well become a hermit.

I biked home to a yummy aroma in the house and John said “There are fresh protein muffins if you want one.”  Did I? Oh yes!  They are lemon poppyseed flavored.

I made some blueberry sauce and slathered a muffin with it.  Nom, nom, nom!  I loves my hubby.

Here is the recipe in full so you don’t have to click.

Basic Muffin
1 c. white flour
2/3 c. whole wheat flour
2 scoops (1/3 cup) protein powder (unsweetened)- this batch had pea protein
3/4 c. sugar
1 Tblsp baking powder
1/2 tsp salt

1 c. milk (1%)
1/2 c. unsweetened applesauce
1  egg

Add in Options
Zest of 1 lemon, 1/4 tsp of lemon extract, 1.5 Tbsp of poppyseeds

Mix dry ingredients in large bowl, and mix liquid ingredients in a separate bowl. Pour liquids into dry and gently fold together until mostly mixed. Then fold in add ins. Spoon into 12 standard muffin cups or 6 jumbo muffin cups. Bake at 400 for 20 mins (std.) or 30 mins (jumbo) or until golden brown.

Approximate nutritional info of basic muffin Jumbo size:

Cal: 270, Fat: 2 gram, Carbs: 37 grams, Fiber: 3 grams, Protein: 14 grams

The calories would be half that if you did the regular normal people muffin size and not the jumbo Lori size 😀

My life is good right now.  I am so appreciative of that.  10 pounds be damned.

After a busy morning of work, I had some lunch.  A burger with laughing cow and some caramelized onions.

I make up the onions and freeze them so I can pull out a couple tablespoons at a time when desired.  The only way I eat onions ever is caramelized.  Maybe an onion ring, but I am more likely to pull the coating off and leave the onion behind.  (there, I said it).

John also made me my latte today.  I really am a lucky girl.

With a date!  I am really trying to control the snacking today.  That habit really made an appearance again lately.  I lot of people complain about food in the office, but it can be just as bad working at home because there is all kinds of food available because we live here.  Not even junk food, but you can easily make a piece of toast or grab some nuts, etc.

Dinner time!  More popcorn fish.  Hello little nuggets.  I really am liking these.  Wonder if I could make these with a firm mild white fish.

An evening of house cleaning on tap.  The renovation project is pretty much done – yay!  I will get some pictures and post this week.  Now there is a lot of time in the evenings available to us :mrgreen:

See you all for Bagel Wednesday!

Breadipus Rex – aka Sourdough Bread

We have a new pet in the house.  It’s my sourdough starter!  Meet Breadipus Rex.

In my quest to be a Jill of all trades, I decided to conquer the realm of sourdough and make my own starter.  Starter is actually really easy. It is just flour and water.  The key is time.  You start with equal parts of flour and water (say 50 grams of each).  Mix and let it sit overnight.  The next day,  do another 50/50 flour water mix to feed it.  For the subsequent days, discard half and then replace with a new 50/50 mix.  The reason for the discard is that your starter will grow exponentially if you just keep adding flour and water.  You may not see anything for a long time, as happened to me.  I think the cooler environment slowed growth. It was a good 5 days and then the starter had bubbles in it.  After each new feeding, the starter bubbled and grew to what you see above.  It smells like yeast, too.  I nurtured a new pet!

I decided on a lazy sourdough – aka the no-knead method.  I don’t mind something taking a lot of time if most of that time doesn’t involve me doing anything :mrgreen:

This recipe could not have been simpler:

Ingredients:

  • 1/4 cup of sourdough starter
  • 1-1/4 cups of warm water
  • 16 oz of flour (I used unbleached white as a test)
  • 1-1/2 teaspoons of salt

First off, stir the starter so that you are measuring actual starter and not just bubbles:

In a large bowl, mix the starter with the warm water:

Add the flour and the salt and mix well.  I chose white flour for this first loaf because I wasn’t sure how well I would do working with sourdough and didn’t want the complications that whole grain flour baking can introduce. This was all about the method.

I did the final mixing by hand to make sure all flour was incorporated.  Then I formed into a ball and covered with plastic wrap to sit overnight on the counter.

The next morning, I checked the bowl, curious to see what happened.  We have some proofing!

Breadipus Rex did his job.  Check out all the yeast bubbles:

I was quite pleased with myself at this point.  Now, this was the most amount of work to be done with the dough.  I dumped it out onto a floured board.  It is pretty sticky.

Using floured hands, I pushed the dough into a  rough rectangle.

Then fold 1/3 third of the dough over:

Then fold over the other other third  so you have a short rectangle (unpictured).  I then folded that over lengthwise to make a square:

Then I picked this up and folded the corners under to make a round ball.  I dropped this into a parchment paper lined casserole dish (which has a lid):

That took all of 1o minutes.  I do like the easy.  I covered this with plastic wrap and we went out to enjoy a nice leisurely breakfast bagel 😀

About 2-1/2 hours later or so, I checked the dough:

I took the dough out of the casserole dish, which was the reason for the parchment paper sling.  You need to heat up the casserole dish, so the sling made it easier.  I wanted the dough in the dish it would bake in to proof for size reasons.  I actually thought ahead on that, and before coffee, even!

The casserole dish and lid went into the oven at 450 degrees F to heat up.  I used a knife to put an X on the dough:

In looking at this dough, I really didn’t think I would get any rise out of it, and I was a little concerned about my success.

Once the oven heated up, I used the sling to drop the dough into the casserole dish and put the lid on (remember the lid is hot!).

Bake for 30 minutes, then remove the lid and bake another 15 or so until the crust is golden brown and the loaf  sounds hollow.  I about squealed when I saw what came out of the oven!

That score made quite the split in the bread, too!

After what seemed to be an interminably long wait to cool, we sliced the loaf.  It had a wonderful crunch and chewy texture to it.

The bread had a wonderful sourdough flavor to it as well.  Perfect with a little butter and strawberry jam:

I am in love!  Did you know that true sourdoughs are well tolerated by celiacs?  Something about the natural fermentation.  Just make sure if you buy sourdough that it doesn’t have added gluten or dough conditioners.

Starter upkeep. One you have the starter made, feed it a dose of flour/water and stick it in the fridge.  You can feed it once a week or so to keep it active (discarding some each time). The fridge will retard the growth of the yeast and make it a little dormant.  Just take it out of the fridge, stir it up, and bring to room temperature to use.

Who wants cheese souffle?

Veggie day #4 under way.  Thursday mornings are always very quiet.  John sleeps later because of poker on Wednesday night and I don’t go to the gym, so it is good jammie time and a little blog reading.  I made up some coconut flour waffles for breakfast:

I got going on work right away.  I usually finish up early on Thursdays because it is normally a busy day and without going to the gym, I get an earlier start.  Yay!

Lunch time was a new fangled PB&J.  I used some of my wheat bread and mixed up some peanut flour with water and cinnamon.

Orange marmalade on top. I also decided on cooking up veggies for lunch, just for something different. 23 grams of protein with lunch!  Love that peanut flour.

John had also brought cookies that he baked off to the game last night.  I don’t know if any of you recall that I got some frozen cookie dough through fundraiser a few weeks ago.  After I had a binge on dough, I have not had any of those cookies (or dough) since that time.  I just haven’t wanted any.  Well, he brought some home as they were not as popular as the candied nuts were (those are gone).  I broke a cookie into 3 pieces:

I ended up eating the whole cookie.  It was okay.  I like the raw dough better. Salmonella be damned! I enjoyed it with  a nice latte today.

For a veggie meal tonight, I wanted eggs and cheese, but not an omelet.  So – I pulled out an old recipe we have done before.  Cheese souffle!  En francais everyone!

Based on Alton Brown’s Souffle. I love how he makes something that seems intimidating pretty easy to do.

  • 2 tablespoons almond meal
  • butter for greasing casserole dish
  • 1 1/2 ounces (3 tablespoons) butter
  • 3 tablespoons flour
  • 1 teaspoon dry mustard
  • 1/2 teaspoon garlic powder
  • 1/8 teaspoon salt
  • 1 1/3 cups low fat milk, hot (1% milk)
  • 4 large egg yolks
  • 6 ounces reduced fat cheddar (I used 3 oz of Cabot 75% reduced fat and 3 oz of 50% reduced fat).
  • 5 egg whites
  • 1/2 teaspoon cream of tartar

Preheat oven to 375 F.  Use butter to grease an 8 inch souffle dish.  Dust with the almond meal (you can use bread crumbs or grated parmesan cheese if you don’t have almond meal).

In a bowl, whip the egg whites with the cream of tartar to stiff peaks and set aside.

Heat the milk in the microwave until hot (but not boiling!)

In a small saucepan, melt the butter and cook out the water.

While this is melting, combine flour, dry mustard, salt, and garlic powder in a small bowl.  Add this to the melted butter and mix well.

Cook for 2 to 3 minutes.  Now add in the milk, whisking constantly and bring to a boil.

Remove from heat.

In another bowl (yeah, this makes dishes), beat the egg yolks until they are a creamy yellow color.  Add a little bit of the hot milk mixture to this and whisk to temper the egg yolks.

Keep adding a little more milk and whisking well.  After you have done about half the mixture, just add that back to the pot and whisk well.  Hopefully, you have avoided scrambling the egg yolks.  Add the shredded cheese and stir to mix and melt.

There should be enough residual heat to do this, but if not, put over low heat. Smooth and creamy!

Fold the cheese mixture into the egg whites a little at a time.

Don’t stir as you don’t want to deflate the whites.  Just turn the batter over with a spatula.

Pour this into your baking dish.

Bake at 375 F for 35 minutes.  You might want to put it on a cookie sheet in case you get souffle runoff!

Check it out!

Entire recipe is 1308 calories, 82 grams of fat, 40 grams of carbs, 2 grams of fiber, 97 grams of protein. Note, this is based on using 1% milk and 3 oz of 75% reduced fat Cabot and 3 oz of 50% reduced fat Cabot cheese.  Do not use fat free cheese.  The cheese has to be able to melt. Just don’ t do it, please.

So, if you divide this into 6 servings, each would have 218 calories, 14 grams of fat, 6.5 grams of carbs, 0.5 grams of fiber, 16 grams of protein.  Not bad!  In fact, very good!

Yum!!!!


Eating vegetarian today is not a problem.  Although a side of crispy bacon would be pretty awesome with this.  Don’t be afraid to try this.  There are steps, but it really isn’t all that hard and tastes soooo amazing.  It took about a half hour of prep to get it in the oven with me stopping to read directions and take pictures.

Question: Have you ever made or eaten a souffle?

Recipe: Whole Wheat Bread

Now that biking season is here and I am upping carb intake now, I thought I would share this bread that I made today.

When baking with whole wheat flour, one of the tricks is to use a little more yeast and to use less flour so you don’t end up with a brick-like loaf.

I also like white whole wheat flour, as it seems to be lighter in texture.

Ingredients:

  • 1 1/4 cups milk (I used 1%)
  • 1/3 cup of honey
  • 3 tablespoons of butter
  • 3 teaspoons of yeast (which is a little over 1 packet)
  • 3-1/2 cups of white whole wheat flour
  • 1/4 cup stone ground cornmeal
  • 1-1/2 teaspoons of salt

In a microwave safe container, combine the milk, honey and butter and heat to about 110 degrees F.  Let sit for the butter to melt if it has not. Add this to the bowl of your stand mixer. Sprinkle on the yeast.  Let this sit for about 10 minutes for the yeast to bloom.  It will become foamy.

Put the paddle on your mixer and add 3 cups of the wheat flour, the cornmeal and the salt.  Mix until combined.

Switch to the dough hook on the mixer. Now set a timer for 10 minutes and let the dough hook knead the dough.  This will be a stickier dough, so don’t be too alarmed, but add the other half cup of flour slowly during this time.

After 10 minutes of kneading, pull the dough off the dough hook and shape it roughly into a ball.  It will be a little sticky.  Put this back in the mixing bowl, cover with plastic wrap and put in a warm place to rise until double.  About 2 hours.  One trick? Put it in your oven with just the oven light on and that will give enough warmth to help the dough rise if your house is cold like ours.

After the dough has risen, prep a loaf pan.  I make a parchment paper sling.  I don’t know what else to call it, but that is the best term.

I spray the loaf pan, which helps the parchment stay in place (and keep the corners of the bread from sticking).  It just makes getting the loaf out so much easier.

Poke the dough down to get rid of some of the air. Note you can see the dough is still a little sticky.

This is kind of fun, actually.  Or I have no life.  You decide.

Once the dough is deflated, shape into a loaf and drop into the prepared pan.

Cover with plastic wrap sprayed with nonstick spray (unless you want dough and wrap married for life).  Place back into warm spot for about another hour until risen.

Note:  I would let this rise a little higher than this as it does not rise much during the baking.

Preheat the oven to 350 F and bake the loaf for 40 minutes or until golden brown.

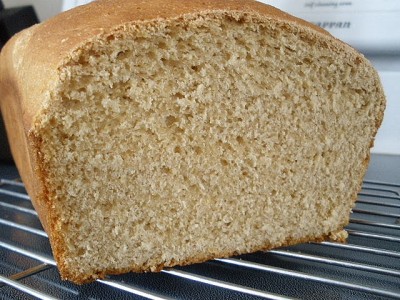
It is a heavier loaf because of being entirely whole wheat.  The loaf weighs about 2 pounds!

Cutting the loaf into 12 slices
Calories 214
Fat 3.7 g
Carbohydrate 38.2 g
Fiber 3.7 g
Protein 6.0 g


Bread machine users – just put all ingredients into your machine in the order directed and let it go.

Crispy Nuts

Seems to me I need to do a group challenge or something again, which seems to be the more popular suggestion 😀

I tried a different breakfast today.  I made up protein waffles, and used 2 triangles for a bun for an egg sandwich with laughing cow.

The strawberries have some whipped cream drizzled on them that really needs to be re-whipped.

Calories for breakfast with my coffee drink – 388.  34 grams of carbs, 19 grams of fat, 22 grams of protein.  Staying power? Fail!  I was hungry not even 2 hours later.  Really hungry. I think there was just not enough fat in this meal.  Or maybe not enough calories.  It was about 100 calories less than normal, but then I did not exercise before breakfast either.

So I had some of these:

For lunch I had what I told Roz was the Cadillac of yogurt – Fage!

I don’t buy it often because it is pricey, but there is no yogurt that really compares as far as texture and taste.  Sometimes you do get what you pay for.

I mixed in some pumpkin, flax, a teaspoon of maple syrup and a boatload of cinnamon.  Then crumbled some pecans on top.

I managed to eat my lunch standing at the counter talking to John about Disneyworld.  That wasn’t very mindful.

During the course of the day, I tried another recipe from Nourishing Traditions for Crispy Nuts. It requires soaking of the raw nuts overnight in lightly salted water (1 cup almonds 1 cup water, 1/2 tsp salt), which I actually finally remembered to do.

She recommends skinless almonds, but I wasn’t going to blanch and peel these.

Then drain.

Interesting that the almonds plumped up and were softer.

Spread out on a cooking pan:

Sally Fallon says to bake for 12 hours at 150 degrees.  I’m sorry, but no way am I going to leave my oven on for 12 hours.  What a waste of electricity!  It’s supposed to preserve the enzymes at the lower temperature.  Bye-bye enzymes.  I put them in the toaster oven at 250 degrees and it took for-ever.  Forever!  I was afraid I would burn them, so I just kept setting the timer for 20 minute increments.  I was thinking it was a pain at this point.  After about 1-1/2 hours, I let a couple cool and tested them:

See how they don’t really look any different than raw almonds? The verdict?  Yum!!  They are crispy, but not like roasted nuts.  Almost dehydrated, which is pretty much what they are.  After thinking that it was an annoying process, I find myself saying I would do them again this way because they are very good.  And I can’t stop eating them! :mrgreen:   I think if you have a food dehydrator, it could be much easier.

So that is 3 different kinds of nuts I have consumed today…

Latte break:

And I went out and worked in the garden as the system was down for work.  Unplanned break.  I got a delivery of plants today!

The red hot pokers (heehee) plus 2 of the 3 coneflowers.  I got the emerald and the milkshake, but the tiki torch is backordered until the fall. Booo!  So, I planted these since the rain stopped and the sun came out.

Since the afternoon was so nice, I grilled up some chicken.  I made a fun plate for dinner with sweet potato topped with leftover cheesy cauliflower (thanks Green Giant!) and the chicken.

Very interesting combo.

We went out for a quick 8 mile bike ride so I could burn off some of those nuts today.  One of those  check the radar and cross your fingers ride 😀  We made it fine.  My patched tire is not so good, though.  Going to have to replace the whole tube before this weekend’s long ride.

Work is functioning again, so I have to catch up tonight!

Question:  Have you ever tried Fage?

My perfect omelet technique

Rather than post more protein waffles with blueberry sauce or one of my hughjass BBQ chicken salads that I ate today, I thought I would show my secret technique for the perfect looking omelet:

This is what I had for dinner.  Nom, nom!

This is more of a technique than a recipe because you should feel free to do whatever you want in the middle.  The only thing is that whatever you put in the middle should be cooked to doneness and heated up, since it doesn’t take long.

For this omelet, I used 1 whole egg plus 2 egg whites (liquid).  I whisked them up and set aside while I sauteed my broccoli in some coconut oil.  This is the pan I used, which is an 8 inch nonstick pan with a lid.

Brand is Wearever and I seriously love this pan.  Cooked broccoli is set aside to the right, which I also did in this pan.  I sprayed the pan with a bit of cooking spray.  I would say a little over medium on the heat here (6 on my stove that goes to 10)

Then added the egg mixture:

I use a spatula to move the bottom of the eggs a little bit for maybe a minute.  You don’t want to scramble them, but just push it around a bit since the middle is usually thicker than the edges.

It will look just like that.  Now comes my secret technique!

Slap a lid on it!  This will set the egg.  Let it sit for a minute or two.  This is why you don’t want the heat too high or you will burn the bottom.  Now is the time to heat up any  middle ingredient.  Got leftover veggies?  Pop them in the micro for 30 seconds to heat up.  Same with cooked meat.  My broccoli was already warm because I just cooked it.

Check the omelet and it will be puffed up a little and the top will just be set and not runny:

Now add whatever you want in the middle.  I added my cooked broccoli and a chopped up laughing cow wedge.  Feta is also a nice addition to this, btw.

Try to keep the filling over half of the omelet.

Slap the lid back on for a minute:

This will melt any cheese if you have it in there.

Uncover, then take your spatula and fold over the empty half of the omelet.

Key here – hold the omelet in place for 15 or 20 seconds to let it settle in place, otherwise it will flop back open.

Slide onto a plate and you have a picture perfect omelet!

It takes less than 10 minutes to have a purty omelet and a perfect way to use up bits of leftovers from the fridge. Yum!

Question:  What do you stuff your omelets with?

Socca Bread

I have a bag of chickpea (besan) flour and was not quite sure what to do with it.  Ever wonder why you make those purchases sometimes? :mrgreen:

In trying to do some grain-free days, breads are the things that I was surprised that can be done grain free.  No, they aren’t pillowy and doughy like gluten breads, but surprisingly tasty creations can be made.

I found a recipe for something really simple (which I love) by Dave Liebovitz called socca

I did mine a little differently, but I liked the results, so that is all that counts.

Ingredients:

  • 1 cup (120 grams) of chickpea flour
  • 1 cup of warm water
  • 1 tablespoon of oil (I used coconut oil)
  • 3/4 tsp salt
  • A bunch of fresh ground pepper
  • 1.5 more tablespoons of oil (to be used in cooking)

The only trick with this recipe is that it needs a little prep time to let the batter soak.  I think you could do this the night before or in the morning and let the batter sit.

In a bowl, whisk together the water, chickpea flour, oil, salt and pepper.

Cover and let this batter sit for at least 2 hours.  So setting this up in the morning would probably be good.

After sitting, the batter didn’t look all that different, so I am not really sure what the long soaking time is for.

It didn’t really thicken up that much. It is like pancake batter.

When ready to cook, take a cast iron skillet (10 inches) or probably a pie plate would work – and put it in the oven and add the remaining 1.5 tablespoons of oil.  Turn the oven on to 450 degrees and let the pan get hot.

Once the pan is hot, give the socca batter a stir and pour into the pan.  It will sizzle.

Bake at 450 F for 15 minutes until the socca is set.

Now turn on the broiler element to high and broil the socca for several minutes until it gets brown spots on it.

De pan and cut into wedges.

I cut this into 4 big wedges (you don’t have to be that greedy).

Nutritional stats:

Per wedge:  165 calories, 10 grams of fat, 13.5 grams of carbs, 2.5 grams of fiber, 5 grams of protein.

The verdict? Yum!  It is sort of like a flat bread with a bit of soft texture to it.  I think traditional socca might be thinner and crisper, but this held up it’s shape to be topped with BBQ chicken and cheese for a  pizza wedge.

It did well the next day popped into the toaster oven to crisp up.  This was just a basic recipe and I have seen those that put onion and rosemary into the batter, which would be pretty tasty I think (especially if the onions are precaramelized).  I am thinking without salt but using honey, this could be the basis for a dessert.  Thinking like a fruit pie or something.

Lot’s o’ potential with this recipe!

Recipe: Coconut Flour Bread and Biscuits

I have been coconut obsessed lately.  The coconut flour has been fun so far, but finding recipes has been hit or miss.  I looked on the web and so many coconut flour recipes also have all kinds of other flours which I don’t have on hand, or just a billion ingredients.  I wanted to make things with fewer ingredients.  The problem with coconut flour is that it doesn’t behave like a gluten flour (duh).

I found this book at the library:
Cooking with Coconut Flour

Bruce Fife thinks along the line that I do, to use coconut flour as the base and not so much an additional ingredient.

I decided to make the coconut flour bread. This is gluten free/grain free if your baking powder is.  This also is not a traditional sandwich bread, which is kind of what I was hoping for, but I still liked it.

Ingredients:

  • 3/4 cup coconut flour (90 grams)
  • 1 tsp baking powder
  • 1/2 cup butter
  • 6 eggs (room temp is best)
  • 2 tablespoons honey
  • 1/2 teaspoon kosher salt

Preheat oven to 350 F.  Line a 9 inch loaf pan with parchment paper, or grease well.

Melt the butter in the microwave and let it cool a bit while getting the rest of the ingredients together.

In a small bowl, sift together the coconut flour and baking powder. Don’t skip this step as coconut flour can be lumpy.

Mix together the eggs, melted butter, salt, and honey.  You can use a whisk or a mixer.  It’s an easy recipe.

Add the coconut flour/baking powder mixture:

Mix well.  The batter will be very thick:

Spread into the loaf pan.

Bake at 350 for 30 minutes.

Remove from the pan carefully. (this is why parchment is the best to use as a sling).  Cool on a wire rack.  This is fragile bread, much like a biscuit. Cool completely before slicing so it doesn’t crumble.

The flavor? Very slightly coconuty, but almost like cornmeal muffins.  Not really sweet, but just a hint.  John asked me if there was cornmeal in it.  I think this would be awesome with some shredded cheese thrown into the batter!  We both really liked this bread.

I cut this loaf into 10 slices.

Nutrition per slice:

Calories: 173, Fat 12.5 g, Carbs 10.5 g, Fiber 4 g, Protein 5 g.

Don’t be afraid.  One slice of this bread kept me full all afternoon on my long work day.  I think next time I would just make these as 10 (or even 20)  drop biscuits instead of doing in the loaf pan.  I think cooking for 12 minutes to start and keep checking them.  I will amend this page once I make these again. (see below)

This is the slice size.

Yum!

Update 04/06/2011

I made the above recipe and made biscuits, which were successful!  After mixing the batter, I used an ice cream scoop to portion out the dough:

I think this is 1/4 cup scooper?  Anyway, it made pretty much 10 equal portions, which is great because the nutritional stats are the same as the 10 slices of bread.  I love convenience.

So, I lined a half sheet pan with parchment paper and doled out the dough:

I flattened each dough pile a bit just with my fingers.

Bake at 350 for about 25 minutes until golden on the bottom and just starting to brown on top.

Remove to a rack to cool.

Yesiree – I officially puffy heart this recipe!