Category Archives: recipe

Recipe – Oopsie Rolls

There are the Magic Rolls, which have gluten in them, but tasty.  Then there are the Oopsie Rolls, which are gluten and grain free!  These are an easy alternative for buns.  This is the recipe by Jamie of Your Lighter Side.

The nice part about this recipe? 3 ingredients.

Please head over to Jamie’s site for the exact recipe. 

Preheat the oven to 300 degrees F.

Line 2 baking sheets with parchment paper or a silicone liner.

You need 2 mixing bowls.  Separate the eggs, putting the egg whites in one bowl and the yolks in another.  Do not get any yolks in the whites or they won’t beat up.  Add the cream of tartar to the egg whites.

Using an electric mixer, whip the egg whites to stiff peaks:

In the other bowl with the egg yolks, add the cream cheese:

Using the same beaters (meaning no need to wash), beat this until the mixture is smooth.  It will take a few minutes.

Now comes the folding.  Kind of like a souffle, which is sort of what these are.  Add 1/3 of the whites to the yolks and stir in to lighten up the mixture a bit.

Now do 2 more installments of the whites, folding gently to incorporate to keep as much fluff as possible.
Now using a spatula – or an ice cream disher, which I like to use – dollop the mixture onto the lined baking sheets.  I used one disher scoop and got 8 piles.
The last few were a little runnier, but that seemed okay.  I think I could have made the egg whites stiffer.  If your batter is much stiffer, then smooth it out a little to make a disk.

Bake at 300 degrees for 25-30 minutes.  Do not over bake.

Remove to a wire rack to cool, which takes like 2 seconds LOL.  Let them sit a while before eating as they set up a little firmer with time.  They are very delicate at first.

Store in a single layer in the fridge.  Let them come up to room temperature before you use them to keep them from sticking.

My bun:

The verdict?  They are a little on the bland side, but that could be cured with adding some flavor to the batter (I would add it to the yolks).  I did not flavor these as I wanted some with peanut butter.

They are somewhat delicate in texture, a little foamy, if that makes sense.  Very light.  I have done these in the past with cocoa powder and a little stevia to make chocolate ones.  I think these would be awesome to make a tiramisu or trifle dessert.

Nutritional stats:

My batch made 8 rolls.  Each roll has 54 calories, 4 grams of fat, 1.5 grams of carbs, 0 grams of fiber, 3 grams of protein.

Basically just puffs LOL!  I definitely prefer my coconut flour biscuits, but these are a much lower calorie sub.

Lifting and liquor

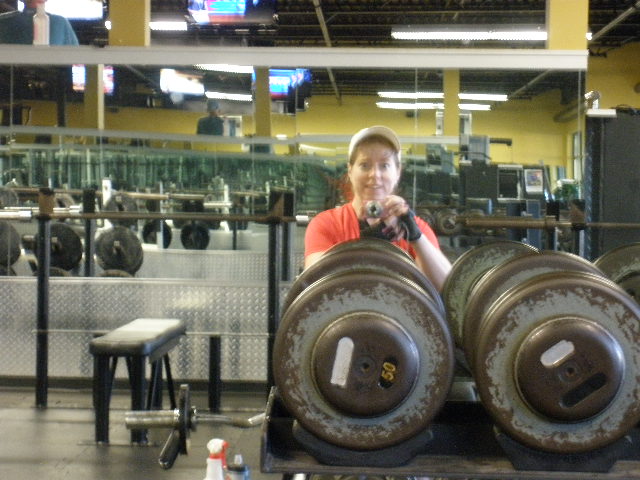
I was up and ready to take my body that I love so much to the gym!  There actually was no one in the free weights section – Squeeee!!! Privacy!  I even took a picture.

To the left is what is called the cardio deck.  It is a raised area in the center of the gym with the treadmills, bikes and other cardio machines.  You can look down on everyone in the other 2 sections while you get your sweat on.

Exercise Set/rep/weight Muscle worked
Deadlift 3 sets of 10 with 65# bar Lower body
Dumbbell Pull Over 3 sets of 10 with 25# DB Back
Barbell Chest Press 3 sets of 10 with 55# bar Chest
Reverse Crunches 3 sets of 12 Core
Nosebreakers 3 sets of 10 with 25# bar Triceps
Good Mornings 3 sets of 10 with 55# bar Low back and hamstrings
Bent Lateral Raise 3 sets of 10 with 15# DBs (30# total) Shoulders
Standing Calf Raise 3 sets of 10 at 80# Calves

This workout took about 35 minutes.  I am surrounded by iron here!

It was very fall today with wind, bright colors and dark clouds. This was taken from my bank drive through on the way home 😀

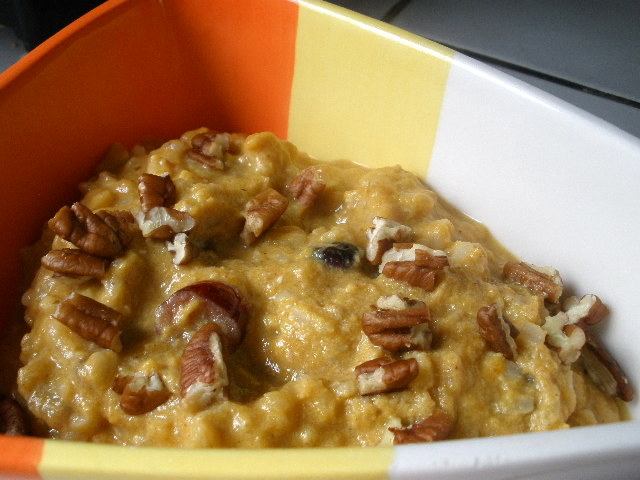
I got home to cook up breakfast.  Pumpkin Brown Rice pudding:

In a pot, mix

  • 1 cup cooked brown rice
  • 1 cup 2% milk (or whatever milk)
  • 1 tablespoon of maple syrup
  • 1 tablespoon of butter (you can omit, not sure it added anything)
  • 1 tsp of cinnamon
  • pinch of salt
  • 2 tablespoons of Craisins
Cook over medium heat for about 15 minutes.  Then add 1/2 cup canned pumpkin.  Temper in an egg and cook for another couple minutes.  Divide between 2 bowls. Top each with 10 grams of toasted pecans.


This was very good, although I *really* don’t like waiting that long for breakfast.  I like 10 minutes tops for cooking.  It’s  easier to do pumpkin oats, but a nice change.


Busy work day.  It’s a nice steady time of year now until the holidays.


When it was time for lunch, I went with the standard on a dinner-out night:
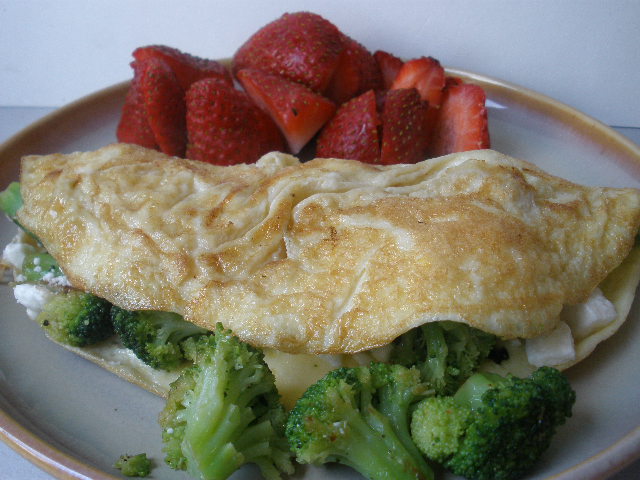
Feta and broccoli omelet.

John made up lattes today, this one was 2% milk:
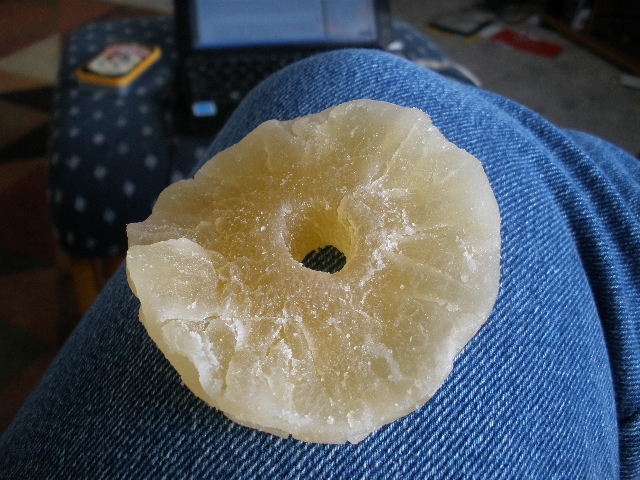
Which I paired with some dried pineapple.
I told myself no candy corn today.  Because I can quit any time, really I can.

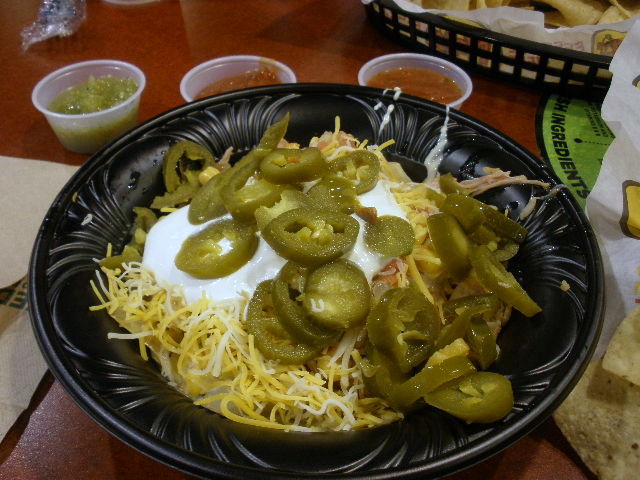
So, this was the week John won the football picks.  My long streak finally ended.  His choice?  Moe’s.

I got a rice bowl with pork underneath all those jalapenos!
This bowl was minus the beans.  I also realize I had rice twice in one day.

Congratulations John.  May this be the first of many winning meals.  (Did I mention yet that it was National Sarcasm Month?)

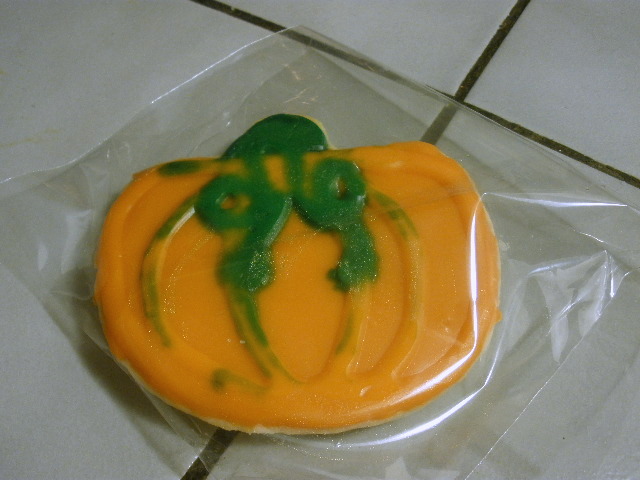
After dinner, I got John his dessert at Panera Bread.  Where I might have picked up this cookie:

 I might have eaten it, too.  Just sayin’…

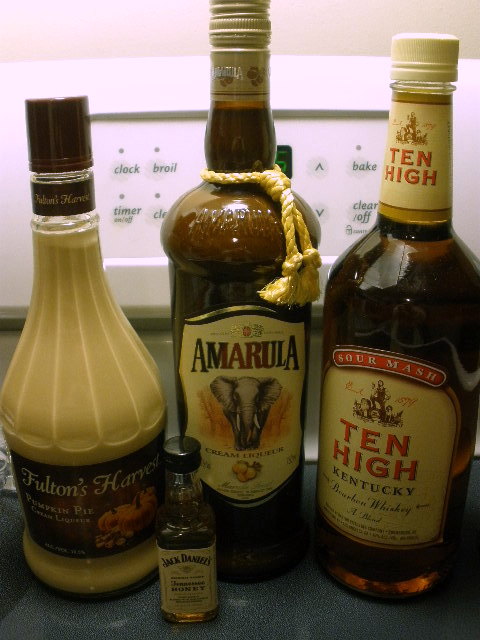
We also did a stock up of our liquor cabinet since it was payday and all.  We have been out of a few things.  We don’t drink a lot, but there are a couple things we like to have on hand.

Amarula is an unusual vanilla cream liqueur with hints of spice and fruit.  It’s good in coffee!  We also got bourbon because eggnog season is coming up.  And the pumpkin pie liqueur just sounded good because I am in pumpkin overload mode about now.  The honey whiskey? Trial bottle.  Good for what ails you 😀  This stuff will last us a couple years.

Pink item of the day was spotted at Panera Bread.  Very appropriate, I might add:

The Breast Cancer Site

Gluten Free Pumpkin Scones

Fall is all about the pumpkin n’est pas?  I am loaded for bear with pumpkin now.   I wanted to make my whole wheat pumpkin scones, but since I am limiting the wheat, I wanted to see how well making them gluten free would turn out.  Turns out pretty well, as a matter of fact!

Ingredients:

  • 2 cups of gluten-free flour (I used Bob’s Red Mill) *see note below
  • 1 tablespoon of baking powder
  • 1.5 teaspoons of xantham gum
  • 1/4 cup brown sugar, packed
  • 1/4 cup granulated sugar
  • 1 tablespoon pumpkin pie spice
  • 1/2 tsp salt
  • 1/2 stick of cold butter (4 tablespoons)
  • 2 eggs
  • 1/2 cup of canned pumpkin
  • 1 tablespoon of milk.

Preheat the oven to 375 F.  In a large bowl, mix together the flour, xantham gum, both sugars, baking powder, salt, and pumpkin pie spice.

(yeah, I am totally stealing the photos from the wheat scone recipe, but the technique looks exactly the same!)

Dice the butter into small pieces.  Make sure it is very cold butter. Add the butter to the dry mixture.

You can use a pastry wire cutter to mix in the butter, but I find that clean hands are your best tool for this job as you get a much better mixing.  You want the mixture to look kind of sandy when finished:

Combine the eggs, pumpkin and milk together and mix well.

Add to the dry ingredients.

Mix until everything is just moistened and turn out onto a well- floured surface.  Keep some flour nearby for dusting, as the dough will be very sticky.  I used probably a couple extra tablespoons of the flour to keep the dough from sticking.  Use more flour than the below picture.

Press the dough into a rectangle about 1/2 an inch thick, flouring your hands or the dough surface if need be.

Cut this in half the long way. Cut each half into 3 equal pieces, then cut each of those squares on the diagonal so that you have 12 pieces (each half of the above dough will make 6 triangles).


Carefully move the scones using a spatula to a baking sheet lined with parchment paper or a silicone mat.


Bake at 375 degrees F for 15 minutes.  Do not over bake.  These will not rise quite as high at the wheat scones. Remove to a wire rack to cool.

Then enjoy!  Top with whatever you choose.  Me, I am partial to glaze.

For a quick frosting for 1 scone, mix 1 tablespoon of reduced fat cream cheese or neufchatel (not fat free, ever) with 1 tablespoon of confectioners sugar with a about 1/4 to 1/2 teaspoon of milk to get a glaze consistency.

Nutritional stats:  Per scone (with no glaze). 156 calories, 5.5 grams of fat, 25 grams of carbs, 2.5 grams of fiber, 3 grams of protein.

If you add the above glaze, it will add 70 calories and 3 grams of fat per scone.

John was quite pleased with these scones.  He said if I hadn’t told him they were gluten free, he would not have guessed.  They are maybe a little more dense than wheat scones, but quite good.

** Note on the GF flour.  I used Bob’s Red Mill All purpose GF flour.  If you use another flour, make sure that it can be subbed 1:1 with regular flour in recipes. The package should state how much per cup of regular flour you need.

Recipe: Crockpot Teriyaki Chicken

This is one of the easiest recipes to date!  I am enjoying finding crockpot recipes and tweaking them a bit.

Now the color of this dish doesn’t look so appealing, but it is tasty!


Tender, fall apart chicken thighs with a sweety and salty sauce with tart pineapple.

Ingredients:

  • 6 boneless, skinless chicken thighs (about 4 oz each)
  • 1/2 cup of reduced sodium soy sauce
  • 2 tablespoons brown sugar
  • 1 teaspoon of minced garlic (1 large clove)
  • 2 tablespoons of fresh grated ginger
  • 1 cup of sliced pineapple (fresh or canned/drained).
  • 2 teaspoons or cornstarch mixed with 1 tablespoon cold water
Mix the soy sauce, brown sugar, garlic, and ginger in the crockpot. Add the chicken and stir around to coat. Then make sure the chicken is evenly distributed in the  cooker.
Cover and cook on low for 6 hours.
Break up the chicken with a spoon, which can be done by pretty much stirring it because the chicken is so tender. Turn the cooker on high to bring to a boil, then add the cornstarch/water mixture and stir to thicken up the sauce.  I actually transferred to another pot because we were hungry and didn’t want to wait for the crockpot to come to a boil 😀
Then stir in the pineapple and serve.  This begs to be served with rice.
Notes:  Do *not* add the pineapple in the beginning.  Pineapple has enzymes in it that will break down the meat and make it mushy.  Also, it will absorb too much of the sauce, so leave it to right before serving.
Nutritional info:  Makes 4 very generous servings at about 250 calories (without rice)
** Tip for the ginger.  Keep the ginger hand in the freezer, then use a microplane grater to grate the ginger.  This makes it easier to grate, not to mention that you always have fresh ginger on hand if you keep it in your freezer!


Recipe: Country Captain Chicken

Another new-to-me recipe this week! I pulled out a Weight Watchers cookbook that I won in a giveaway.

Here is the Amazon linkie for that if you want to get this book. It actually has some good recipes in it!

Today’s choice? Best-Ever Country Captain Chicken.

I am not sure who the captain is or if this really is Best Ever, but we really enjoyed this.  Apparently this is a southern dish, but it seems more Indian to me.  Don’t be afraid of this combo of ingredients!

Normally I tweak recipes a bit, but I just followed this one pretty closely.

Ingredients:

  • 2 teaspoons of oil
  • 1.25 pounds of boneless chicken breast cut into bite-sized chunks
  • 1 small onion (or diced frozen onions like I use – easy!)
  • 1 Granny Smith apple, peeled, cored and diced. (We used a red apple because that is what we had)
  • 1 bell pepper chopped (or diced frozen for the lazy people like me!)
  • 1 teaspoon of chopped garlic
  • 1 tablespoon grated ginger
  • 1 tablespoon of curry powder
  • 1/4 tsp of cinnamon
  • 1/4 tsp salt
  • 1 can of diced tomatoes (15 oz can)
  • 1 cup reduced sodium chicken or veggie broth
  • 1/4 cup of raisins
Cut up the chicken into bite size pieces.
In a pot or dutch oven with a lid, add 1 teaspoon of the oil over medium high heat. Add the chicken and brown, about 5 minutes:
While the chicken cooks, peel and chop the apple and grate the ginger.
We buy the fresh ginger and keep it in the freezer wrapped up. That way you always have fresh ginger available!
Remove the chicken from the pot and set aside. Add the other teaspoon of oil, then put the apple, ginger, onion, pepper and garlic into the pot and cook over medium heat for about 5 minutes.
Add in the cinnamon, curry powder and salt and cook for another minute or so.
Now add the broth, the canned tomatoes with the juice, raisins and the chicken. Bring to a boil, then reduce the heat, cover and simmer for 15 minutes.
This serves 4.
The flavor is complex. A little savory and a little sweet.  Chunky and delicious! I think crusty bread or some brown rice would be great with this.  The recipe also calls for 1 tablespoon of slivered almonds over the 4 servings, but we didn’t have any. That’s only like 3 slivers on each bowl, pfffft!
Nutritional Stats:
Each serving is about 1.5 cups.  Per serving:  Calories: 309, 8 g of fat, 24 g of carbs, 4 g of fiber, 35 g of protein.
This took about 35 minutes from start to finish.  Grain free and gluten free!
**addendum** Reheated the next day and it is even more flavorful!

Gluten Free Banana Bread

This was my first real foray into an alternative flour blend.  I have used coconut flour with good success, but wanted something with a different texture.  So while out shopping this weekend, I picked up 2 things.  One was xantham gum and one was some Bob’s Red Mill GF flour.  I decided to make the banana bread on the package of the flour with some modifications.

Ingredients:

  • 1.75 cups of gluten free flour (not bread mix, but plain GF flour)
  • 2 tsp of cinnamon
  • 1/4 tsp of salt
  • 2 tsp of baking powder
  • 1 tsp of xantham gum
  • 2/3 cup of packed brown sugar
  • 1/2 cup unsweetened applesauce
  • 2 large eggs
  • 1 tsp vanilla
  • 2 medium bananas, mashed (approximately 1.25 to 1.5 cups)
  • 2 oz of chopped pecans

Preheat oven to 350 F.  Line a loaf pan with a parchment paper sling (or use nonstick cooking spray).  Mash bananas and chop pecans and set aside.

In a mixing bowl, blend together the sugar, eggs, vanilla, and applesauce.  Beat well.

In a separate bowl, mix the flour, baking powder, xantham gum, salt, and cinnamon.

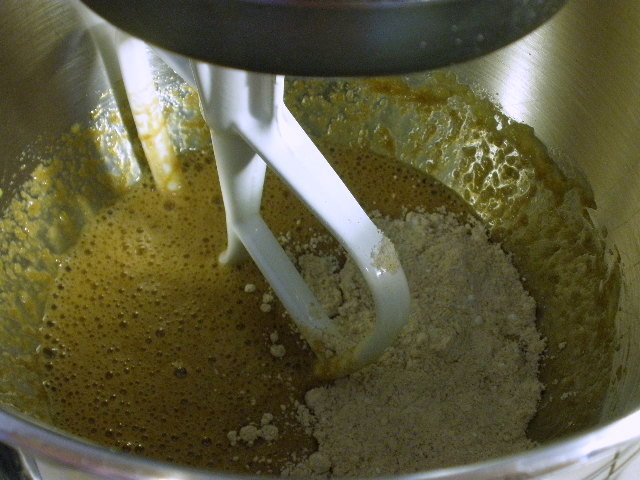
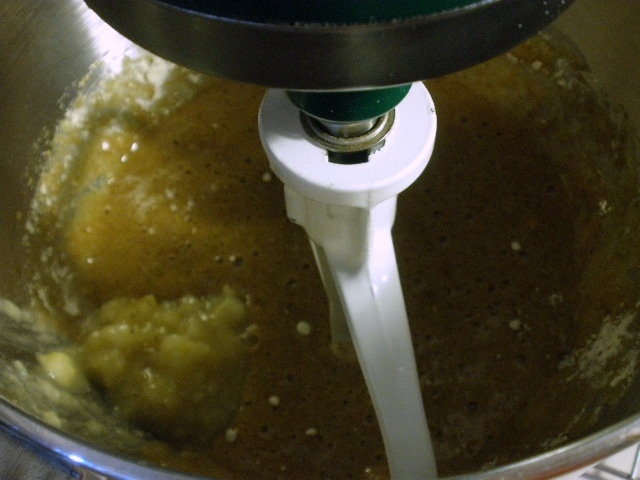
With the beater on slow, alternate adding the flour mixture with the mashed banana until incorporated.

Then stir in the nuts.

Pour the batter into the prepared loaf pan. Proceed to lick the spatula when finished.

Bake for about 55 minutes until a toothpick comes out clean.

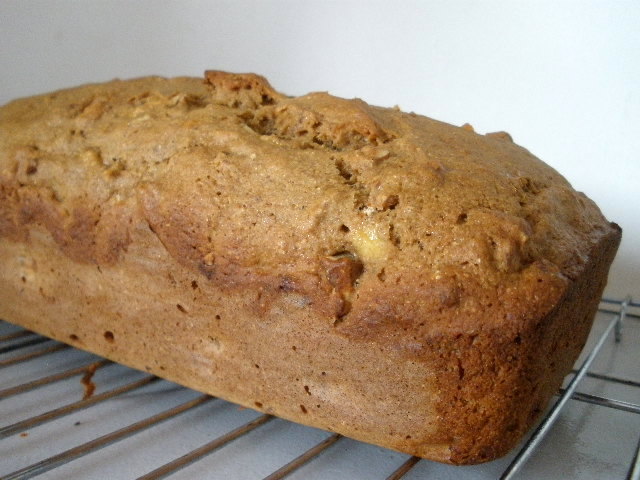
It was hard to wait for this to cool.  I took my walk and then came back in and made up a slice for the game.  Banana bread and football.  Just like apple pie and baseball, right?

It was also good the next morning with a little neufchatel cream cheese!

Stats for the whole loaf: 2070 calories, 59 grams of fat, 426 grams of carbs, 33 grams of fiber, 41 grams of protein.

My loaf weighed 1 pound 12 ounces (or 28 ounces).  That means  dividing the loaf into ten 2.8 ounce slices would mean 207 calories, 6 grams of fat, 42.5 grams of carbs, 3.3 grams of fiber, 4 grams of protein for a slice.  Most people cut a loaf into 12 slices, but not me. I like a big piece of bread. (The slices in the photo above are about 1.5 ounces each).

The xantham gum is supposed to make the bread moist and bind it together, so I don’t know what would happen if you leave it out. I happened to find a smaller bag at my store that was not so expensive, so I bought it.  The Red Mill GF flour is a mix of bean flours and tapioca starch.  There is a lot to learn about how the different flours interact with each other, so I wanted to start out with a premixed blend.  I think I had a good start here and I shall be experimenting more.  I might have to try a yeast bread!

The original recipe called for 1/3 cup of oil, which I substituted with applesauce.  It also called for walnuts instead of pecans and 1/2 cup of raisins.  But raisins are always optional.   :mrgreen:

Crockpot Pork with Peppers and Rice

Yay – the first new recipe of the month!  It is much cooler today – in the upper 60s and gray.  So that meant a warmer dinner and an easy fix-and-forget type dinner. The recipe actually calls for beef, but we had ground pork on had, so that is what we used.  This recipe is gluten free if you make sure your soy sauce and bullion are!

Ingredients:

  • 1 pound of ground pork (or beef or turkey or even reconstituted TVP)
  • 2 bell peppers
  • 1/2 an onion (hooray for frozen and chopped!)
  • 2 bullion cubes or equivalent thing.  We have a liquid veggie broth paste.
  • 1 tablespoon of gluten-free soy sauce
  • 1 cup of uncooked brown rice
  • 3 cups of water
In a skillet, brown the meat, breaking it up into small pieces.
Seed and chop the peppers into chunks.  Also dice the onion if you use a whole one.
Drain the fat from the meat (if there is any).  Then everybody goes into the pool!
Cook on low for 6 hours or on high for 3 hours until the rice is done and water is absorbed.  I turned mine on high for about 20 minutes to finish cooking because we were hungry 😀
Finished product:
Of course, you know I had to put hot sauce on it!  I liked this dish.  It needed something crunchy on the side, though.  John ate some tortilla chips with his.  Now we have a good amount of leftovers!  A very easy recipe.
I was going to try to do nutritionals for this, but it would vary so much depending on the type of meat you put in there.  An average would be about 250 calories per cup.
Question:  Do you use a crockpot?

Recipe: Ricotta Puffs

So I jumped into my grain-free challenge with an interesting recipe for breakfast.  I got it from the The Perfect 10 book and adapted it for me.

Super easy and no fancy ingredients (aka no coconut flour – surprise!).

Ingredients:

  • 2 eggs
  • 1 cup of part skim ricotta cheese
  • 2 teaspoons of honey (or other sweetener)
  • 1/2 teaspoon of vanilla
  • 1 ounce of pecans, toasted and chopped

Preheat oven to 350 F.  Or you could use the toaster oven, which I did so I wouldn’t heat up the kitchen.

Take the pecans and put them in the microwave for about a minute.  This will toast them without the fuss and muss. Set aside to cool while you assemble the other ingrediets.

In a medium bowl, mix the eggs and the ricotta:

Chop the nuts.  Then add those to the ricotta mixture along with the honey and the vanilla.

Mix well and divide evenly among a 6 muffin cup tin.  See how quick and easy this is?? I recommend getting a 6 cup tin to use in a toaster oven.  It’s so convenient!  I put about 1/4 cup of batter in each compartment.

Bake at 350 for 20 minutes until puffed and set.

Note – they will fall once they come out of the oven, so don’t worry.

They are sort of a cross between a souffle and a cheesecake.  Not very sweet, just delicate.  They went perfectly with blueberry sauce:

The original recipe called for agave and also for 1/2 an ounce of parmesan cheese, but I didn’t think the sweet/savory of that would be so good – so I left it out.  I think you could leave out the sweetener and make these savory as well.

Nutritional Stats:

Per puff:  133 calories, fat 9.5 g, carbs 6.5 g, fiber 0.5 g, protein 7 g.

I think these might be quite portable.  I have the others stored in the fridge and will see how they are 2nd day.

Gluten Free chocolate chip cookies

Coconut Flour Chocolate Chip Cookies – gluten free!

I was sent this recipe by reader Katy – thanks!  Not sure of the source on this. These use my beloved coconut flour!  Very easy to make and just a few ingredients.  Don’t you love those type? I cut it in half so I wouldn’t have too many cookies in the house.

I also used mini chocolate chips for more surface area ratio in the cookies, I also changed the amounts of the add ins.

Ingredients:

  • 66 grams coconut flour (1/2 cup)
  • 4 tablespoons butter, melted
  • 1/4 cup brown sugar
  • 2 eggs
  • 1/2 tsp vanilla extract
  • 1/4 tsp salt
  • 54 grams mini chips (1/3 cup)
  • 28 g (1/4 cup) dried coconut

Preheat the oven to 350 degrees.  Line a baking sheet with parchment or a silicone sheet.

In a small bowl, mix the eggs and melted butter with the brown sugar, vanilla, and salt.

Sift the coconut flour into the wet mix (to prevent lumps):

add in the mini chips and coconut.

Stir well to combine.  It may seem really liquidy at first, but remember coconut flour is super absorbent.

I let my bowl sit for several minutes and voila – dough!

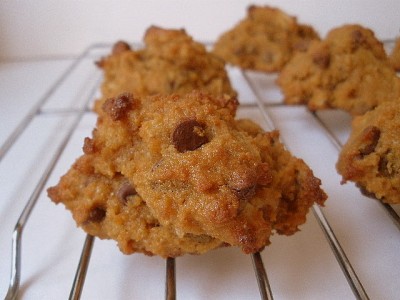
Use a spoon, drop rounded tablespoons onto the baking sheet.  I got 14 out of this mixture, but you can do whatever size you want.

My thumb is there for size purposes, although I could also be giving an A-Okay sign if you like.

Bake at 375 for 14 minutes until the tops are lightly browned.


Nutrition per cookie (with 14 per batch):

132 calories, fat: 6.8 g, carbs: 15.5 g, fiber 3 g,  protein 2.5 g

These are very tasty and moist.

Thoughts: You can probably lighten these up with using egg whites.  Maybe applesauce instead of butter, but that would give a more cake-like texture.  I think I would also try chilling the dough and the rolling it into balls, then flattening the balls before baking.  The dough stayed in the exact shape I dropped it into on the cookie sheet.

Let me know if you try these do any changes to the recipe and I can add it here.

Enjoy!

The Great Veggie Experiment – Caramelized Onions

Okay, first off – I am going to say right here and now that I do not like onions for the most part.  If they are raw and on my plate, I pick them off.  I use a fork, too, since I don’t want the onion smell on my hands.  I won’t eat big chunks of onion in soups or stews.  I do, however, like onions that are caramelized, but only in thin strips.  I also will eat fried onion strings as well (of course they are fried, who wouldn’t like them).  Caramelized onions are a very different animal than regular onions.  The onion flavor is really mild and there is the addition of the caramelization that occurs given them a different flavor.  They are really easy to make.  They just take a little bit of time.

I used 2 big Vidalia onions here.  I think yellows or Vidalias are the best.  Have not tried red onions as I dislike that kind the most!

Peel the onions and use a knife or mandolin to cut very fine slices of onion. The thinner the slices, the faster they caramelize.

In a large saute pan, put in 2 tablespoons of butter and a drizzle of liquid oil).

Turn the heat to medium high and add in the onions.

After a few minutes, I like to add a pinch or two of salt. This helps to draw moisture out of the onions.

Cook for a while over medium high heat, stirring occasionally until the water cooks out of the onion.

Once the water cooks out, the onions will start to become translucent and take on some color:

Now you have to pay more attention to the onions and do a little heat management.  Stir the onions frequently and if they look like they are really sticking to the pan, lower the heat to medium.

Keep cooking and stirring:

You want a nice chocolately color to the onions when they are done.  If you happen to have some red wine on hand, add a few splashes for some extra flavor.  We don’t drink wine, so none available!

Onions nicely caramelized.

They shrunk down quite a bit, too.  Those 2 big onions gave about this much:

I use these mostly as a condiment for things like my omelet last night:

Or top a burger with them:

Since it takes about 30-40 minutes to do these, I will make a lot and freeze the rest.  Then I can just scrape out some onions for a topper and reheat them.  Works like a charm!

So, still a raw onion hater, but I will eat these!